- Get Started
- Image & Video APIs overview
- Developer kickstart
- SDK quick starts
- Try it!
- MCP servers and LLM tools (Beta)
- VS Code Extension (Beta)
- Video tutorial library
- Programmatic asset management
- Programmatic upload
- Upload programmatically
- Create upload presets
- Auto upload
- Moderate images with AI
- Use AI to generate image captions
- Upload images in Flutter
- Upload images in Node.js
- Auto-tag images in Node.js
- Upload multiple files in Node.js
- Upload videos in Node.js
- Upload images in Python
- Auto-tag images in Python
- Upload videos in Python
- Upload images in PHP
- Upload images in Go
- Upload assets in a React app
- Upload assets in a Vue.js app
- Drag-and-drop uploads in React
- Upload assets in a Next.js app
- Upload assets with Server Actions
- Upload assets in Svelte
- Upload assets in a SvelteKit app
- Upload assets in a Remix app
- Upload images in Hono
- Use webhooks to remove backgrounds
- Upload images in Laravel
- Interaction with Cloudinary APIs
- Cloudinary SDKs
- Find your credentials
- Configure the JavaScript SDK
- Configure the React SDK
- Configure the Angular SDK
- Configure the Flutter SDK
- Configure Svelte Cloudinary
- Configure the Javascript SDK in Svelte
- Getting started with Cloudinary in Node.js
- Configure the Node.js SDK
- Configure the Python SDK
- Configure the PHP SDK
- Configure the Go SDK
- Configure the Vue.js SDK
- Configure the Next.js SDK
- List images in Next.js
- Lazy load images with Next.js
- Image fallbacks in JavaScript
- Captioning on upload with Node.js
- Delete assets with Node.js
- Manage images in a Django app
- Cloudinary CLI
- Widgets and tools
- Programmatic upload
- Optimization and delivery
- Transformations
- Get started with transformations
- Advanced transformation features
- Text overlay transformations
- Complex transformations
- Named transformations
- Named transformations using TX Builder
- Advanced image components
- Trim videos in Node.js
- Splice videos in Node.js
- Zoompan effect
- Video transformations
- Crop and resize images in React
- Crop and resize videos in React
- Crop and resize images in Python
- Remove backgrounds and add drop shadows
- AI generative fill in Next.js
- Color accessibility in JavaScript
- Transformations for social media
- Dev Hints on YouTube
- Dev Hints en Español
- Cloudinary Café Training Sessions
- Programmatic asset management
- Additional onboarding resources
- Guides
- Cloudinary Image
- Product overview
- Image transformations
- Image transformations overview
- Resizing and cropping
- Placing layers on images
- Effects and enhancements
- Background removal
- Generative AI transformations
- Face-detection based transformations
- Custom focus areas
- Transformation refiners
- Animated images
- Transformations on 3D models
- Conditional transformations
- User-defined variables and arithmetic transformations
- Custom functions
- Image optimization and delivery
- Programmatic image creation
- Product Gallery widget
- Media Editor widget
- Image add-ons
- Cloudinary Video
- Upload
- Asset management
- Account management
- Retail and e-commerce
- User-generated content
- Accessible media
- AI in action
- Native mobile
- Add-ons
- Advanced Facial Attributes Detection
- Amazon Rekognition AI Moderation
- Amazon Rekognition Video Moderation
- Amazon Rekognition Auto Tagging
- Amazon Rekognition Celebrity Detection
- Aspose Document Conversion
- Cloudinary AI Background Removal
- Cloudinary AI Content Analysis
- Cloudinary AI Vision
- Cloudinary Duplicate Image Detection
- Google AI Video Moderation
- Google AI Video Transcription
- Google Auto Tagging
- Google Automatic Video Tagging
- Google Translation
- Imagga Auto Tagging
- Imagga Crop and Scale
- Perception Point Malware Detection
- Microsoft Azure Video Indexer
- OCR Text Detection and Extraction
- Pixelz - Remove the Background
- URL2PNG Website Screenshots
- VIESUSTM Automatic Image Enhancement
- WebPurify Image Moderation
- Cloudinary Image
- References
- SDKs
- Release Notes
Video transcription
Last updated: Dec-30-2025
Video transcription enables you to automatically generate an audio transcript from a video file. You can use the resulting file can to display a full video transcript alongside your video, added as a text track for standard subtitles, or used for paced subtitles with the Cloudinary Video Player. Transcript generation identifies the language used in the audio and generates the transcript in the correct language.
Use the Cloudinary Video Transcription service to generate your transcripts during upload, via the explicit method on existing assets, trigger generation from the Video Player Studio, directly from the video player when configuring text tracks, or via MediaFlows. Use the transcript editor to easily edit and refine your generated transcripts.
Alternatively, you can use an add-on, either Google AI Video Transcription or Microsoft Azure Video Indexer.
Requesting transcription
To request transcription, set the auto_transcription boolean parameter to true as part of your upload request:
Auto transcription happens asynchronously after your original method call completes. Thus your original method call response displays a pending status:
When the request is complete (may take several seconds or minutes depending on the length of the video), a new raw file gets created in your product environment with the same public ID as your video or audio file and with the .transcript file extension.
For example:
my-video.transcript
If you also provided a notification_url in your method call, the specified URL then receives a notification when the process completes:
Requesting translation
As well as generating a transcript in the native language of the audio, you can also request to generate translated transcriptions. Each translated transcript gets generated alongside the main transcript file with the country and language code appended.
For example:
my-video.en-US.transcript
To trigger translation, set the auto_transcription parameter to an object containing a translate parameter with an array of country and language codes to translate to, for example to generate transcript translations into French, Spanish and German:
Auto transcription happens asynchronously after your original method call completes. Thus your original method call response displays a pending status:
Use your translated transcripts with the Cloudinary Video Player to provide subtitles in multiple languages for your videos.
Requesting transcription from the video player
You can also trigger automatic transcription directly from the Cloudinary Video Player when configuring text tracks without specifying a URL. When you set up subtitles or captions without providing a transcript file, the player can automatically generate one if you've enabled Auto transcription in your account's unsigned actions settings.
For example:
This approach is particularly useful for on-demand transcript generation when you want subtitles but haven't pre-generated the transcript files. For complete details on setting up AI generation from the player, see AI generation.
Cloudinary transcript files
The created .transcript file includes details of the audio transcription, for example:
Each excerpt of text has a confidence value, followed by a breakdown of individual words and their specific start and end times.
.transcript file as an industry-standard .srt subtitle file.Displaying transcripts with the Cloudinary Video Player
You can display your generated transcripts as a text track for subtitles or captions using the Cloudinary Video Player. You can also make use of the advanced information generated to add paced subtitles or word highlighting. To add your transcript, set the textTracks parameter with the relevant configuration.
For transcripts, you don't need to provide a URL as the player assumes the transcript exists with the same public ID as the video. If you set the language, the player looks for the corresponding file with language code appended to the public ID, otherwise it falls back to the original. To control the number of words shown for each line of the transcript, use the maxWords parameter, as shown below.
Here's an example:
And here's an example using translated transcripts:
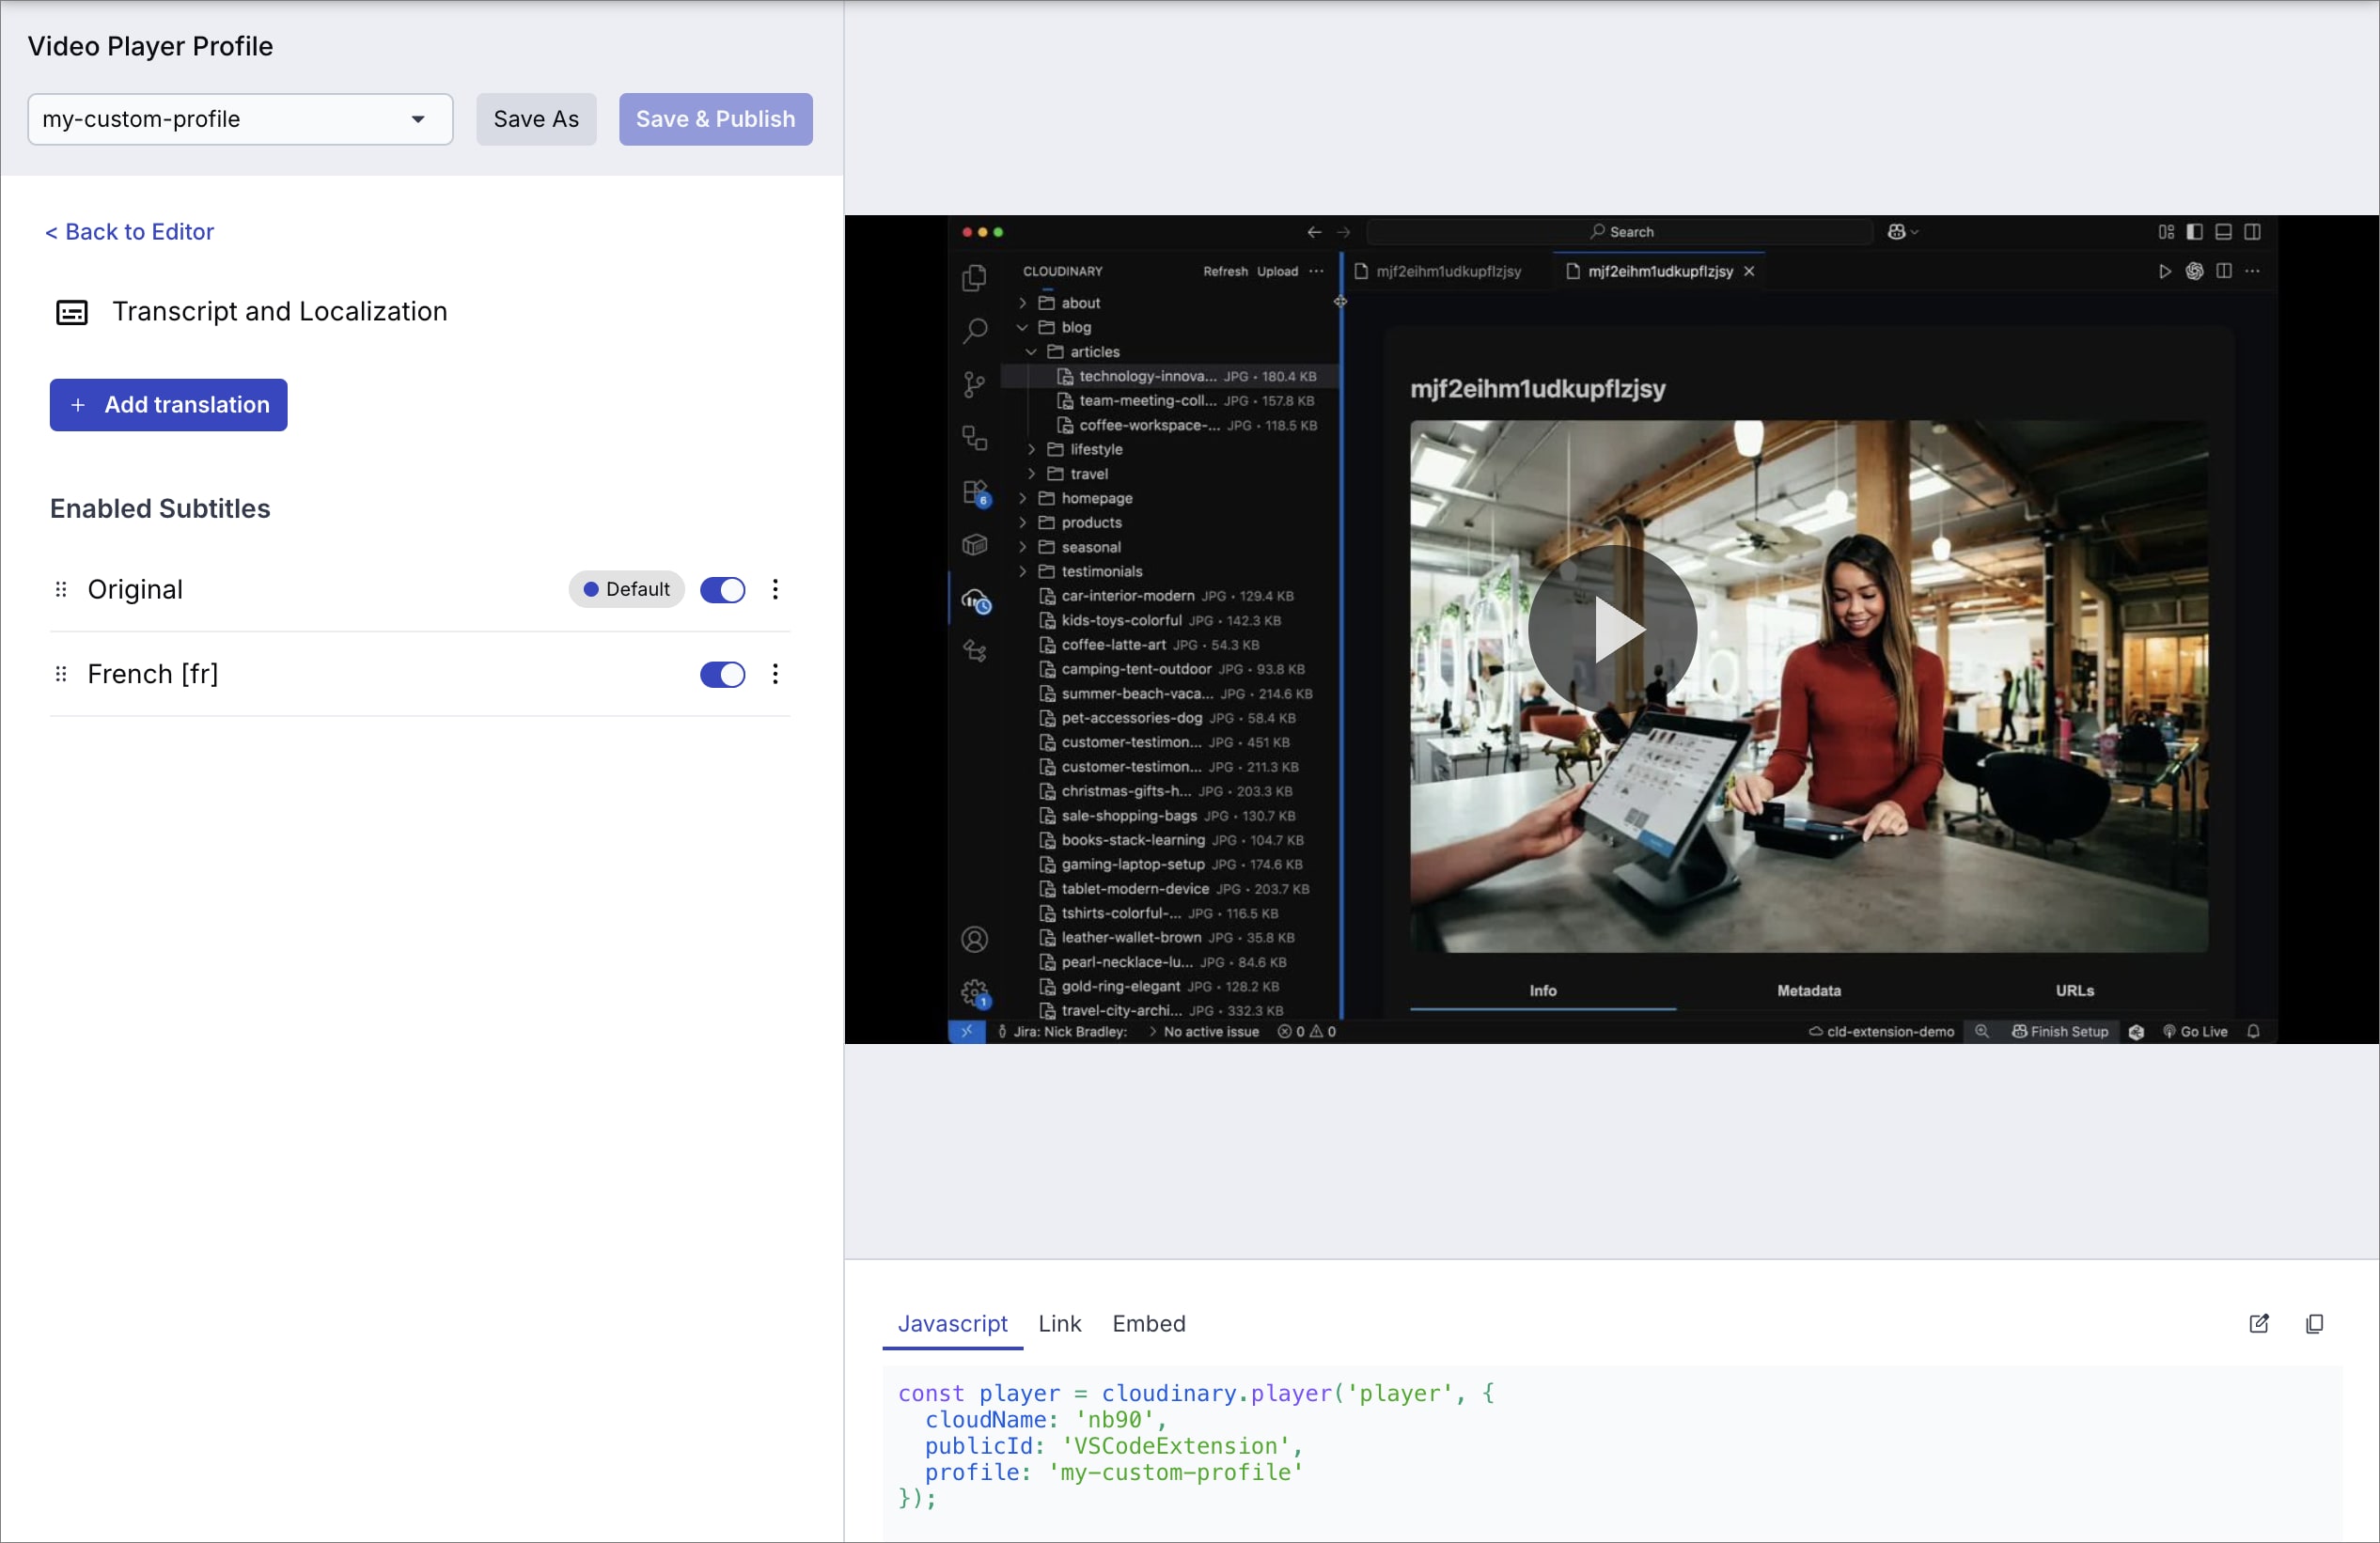
Transcript and Localization editor
The Transcript and Localization editor enables you to generate, edit, and manage transcripts and translations for videos in your Media Library. You can trigger generation of transcripts using the transcription service, edit the generated transcript to ensure the audio matches exactly with the text, and manage multilingual subtitles for your videos.
To open the editor, navigate to the Video Player Studio and select the Transcript and Localization section.
Transcript and localization editor
Editing transcripts
The editor supports adding and editing lines, as well as the individual words within each line. This allows you to refine the automatically generated transcript to ensure accuracy and proper timing.
Managing translations
Click the Manage button to access the language management interface for organizing and controlling multilingual subtitles. This interface provides comprehensive tools for managing your translated transcripts:
- Add translations - Generate new translations directly from the interface
- Reorder languages - Drag and drop subtitle languages to control the order they appear to viewers
- Toggle availability - Enable or disable translations for viewer access
- Set default language - Choose which language displays first when viewers load the video
-
Export subtitles - Download any language in
.vttor.srtformat with a single click
This centralized interface makes it easy to organize existing languages and control how multilingual subtitles get presented to viewers.