- Get Started
- Image & Video APIs overview
- Developer kickstart
- SDK quick starts
- Try it!
- MCP servers and LLM tools (Beta)
- VS Code Extension (Beta)
- Video tutorial library
- Programmatic asset management
- Programmatic upload
- Upload programmatically
- Create upload presets
- Auto upload
- Moderate images with AI
- Use AI to generate image captions
- Upload images in Flutter
- Upload images in Node.js
- Auto-tag images in Node.js
- Upload multiple files in Node.js
- Upload videos in Node.js
- Upload images in Python
- Auto-tag images in Python
- Upload videos in Python
- Upload images in PHP
- Upload images in Go
- Upload assets in a React app
- Upload assets in a Vue.js app
- Drag-and-drop uploads in React
- Upload assets in a Next.js app
- Upload assets with Server Actions
- Upload assets in Svelte
- Upload assets in a SvelteKit app
- Upload assets in a Remix app
- Upload images in Hono
- Use webhooks to remove backgrounds
- Upload images in Laravel
- Interaction with Cloudinary APIs
- Cloudinary SDKs
- Find your credentials
- Configure the JavaScript SDK
- Configure the React SDK
- Configure the Angular SDK
- Configure the Flutter SDK
- Configure Svelte Cloudinary
- Configure the Javascript SDK in Svelte
- Getting started with Cloudinary in Node.js
- Configure the Node.js SDK
- Configure the Python SDK
- Configure the PHP SDK
- Configure the Go SDK
- Configure the Vue.js SDK
- Configure the Next.js SDK
- List images in Next.js
- Lazy load images with Next.js
- Image fallbacks in JavaScript
- Captioning on upload with Node.js
- Delete assets with Node.js
- Manage images in a Django app
- Cloudinary CLI
- Widgets and tools
- Programmatic upload
- Optimization and delivery
- Transformations
- Get started with transformations
- Advanced transformation features
- Text overlay transformations
- Complex transformations
- Named transformations
- Named transformations using TX Builder
- Advanced image components
- Trim videos in Node.js
- Splice videos in Node.js
- Zoompan effect
- Video transformations
- Crop and resize images in React
- Crop and resize videos in React
- Crop and resize images in Python
- Remove backgrounds and add drop shadows
- AI generative fill in Next.js
- Color accessibility in JavaScript
- Transformations for social media
- Dev Hints on YouTube
- Dev Hints en Español
- Cloudinary Café Training Sessions
- Programmatic asset management
- Additional onboarding resources
- Guides
- Cloudinary Image
- Product overview
- Image transformations
- Image transformations overview
- Resizing and cropping
- Placing layers on images
- Effects and enhancements
- Background removal
- Generative AI transformations
- Face-detection based transformations
- Custom focus areas
- Transformation refiners
- Animated images
- Transformations on 3D models
- Conditional transformations
- User-defined variables and arithmetic transformations
- Custom functions
- Image optimization and delivery
- Programmatic image creation
- Product Gallery widget
- Media Editor widget
- Image add-ons
- Cloudinary Video
- Upload
- Asset management
- Account management
- Retail and e-commerce
- User-generated content
- Accessible media
- AI in action
- Native mobile
- Add-ons
- Advanced Facial Attributes Detection
- Amazon Rekognition AI Moderation
- Amazon Rekognition Video Moderation
- Amazon Rekognition Auto Tagging
- Amazon Rekognition Celebrity Detection
- Aspose Document Conversion
- Cloudinary AI Background Removal
- Cloudinary AI Content Analysis
- Cloudinary AI Vision
- Cloudinary Duplicate Image Detection
- Google AI Video Moderation
- Google AI Video Transcription
- Google Auto Tagging
- Google Automatic Video Tagging
- Google Translation
- Imagga Auto Tagging
- Imagga Crop and Scale
- Perception Point Malware Detection
- Microsoft Azure Video Indexer
- OCR Text Detection and Extraction
- Pixelz - Remove the Background
- URL2PNG Website Screenshots
- VIESUSTM Automatic Image Enhancement
- WebPurify Image Moderation
- Cloudinary Image
- References
- SDKs
- Release Notes
Profile picture sample project
Last updated: Aug-31-2025
This guide demonstrates how to build a secure social media-style application that handles user-generated content (UGC) using Cloudinary's advanced capabilities. The app features a Profile page where users can manage their personal information and upload a profile picture, along with a Posts page where they can share thoughts and images.
Overview
The app serves as a demonstration platform for handling user-generated content in a social media context. It implements these main features:
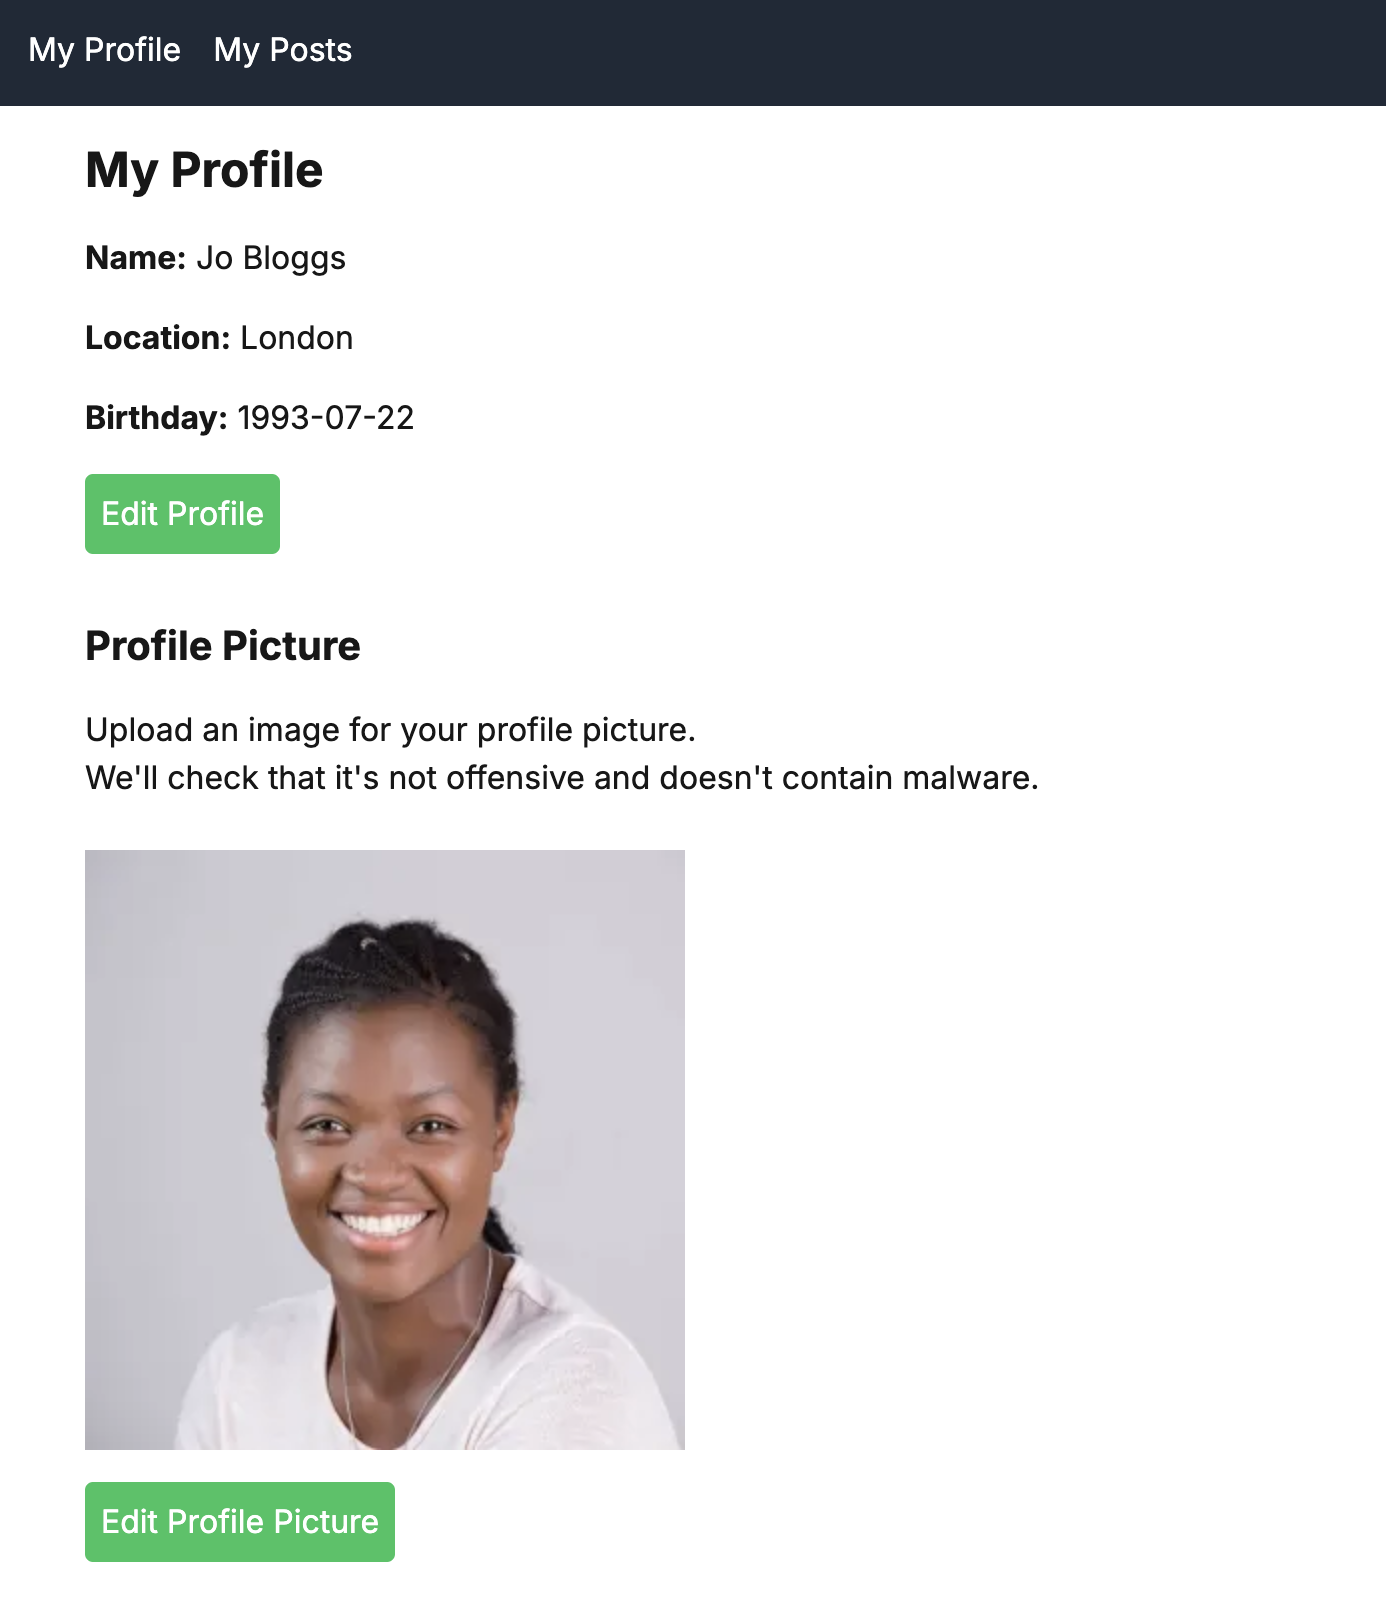
On the Profile page:
- The uploaded image is moderated for appropriate content and checked for malware before being displayed on the page.
- If the image is poor quality, then the quality is improved.
- The image is displayed as a square, focusing on the face, if there is one, or the most interesting part of the image, if not.
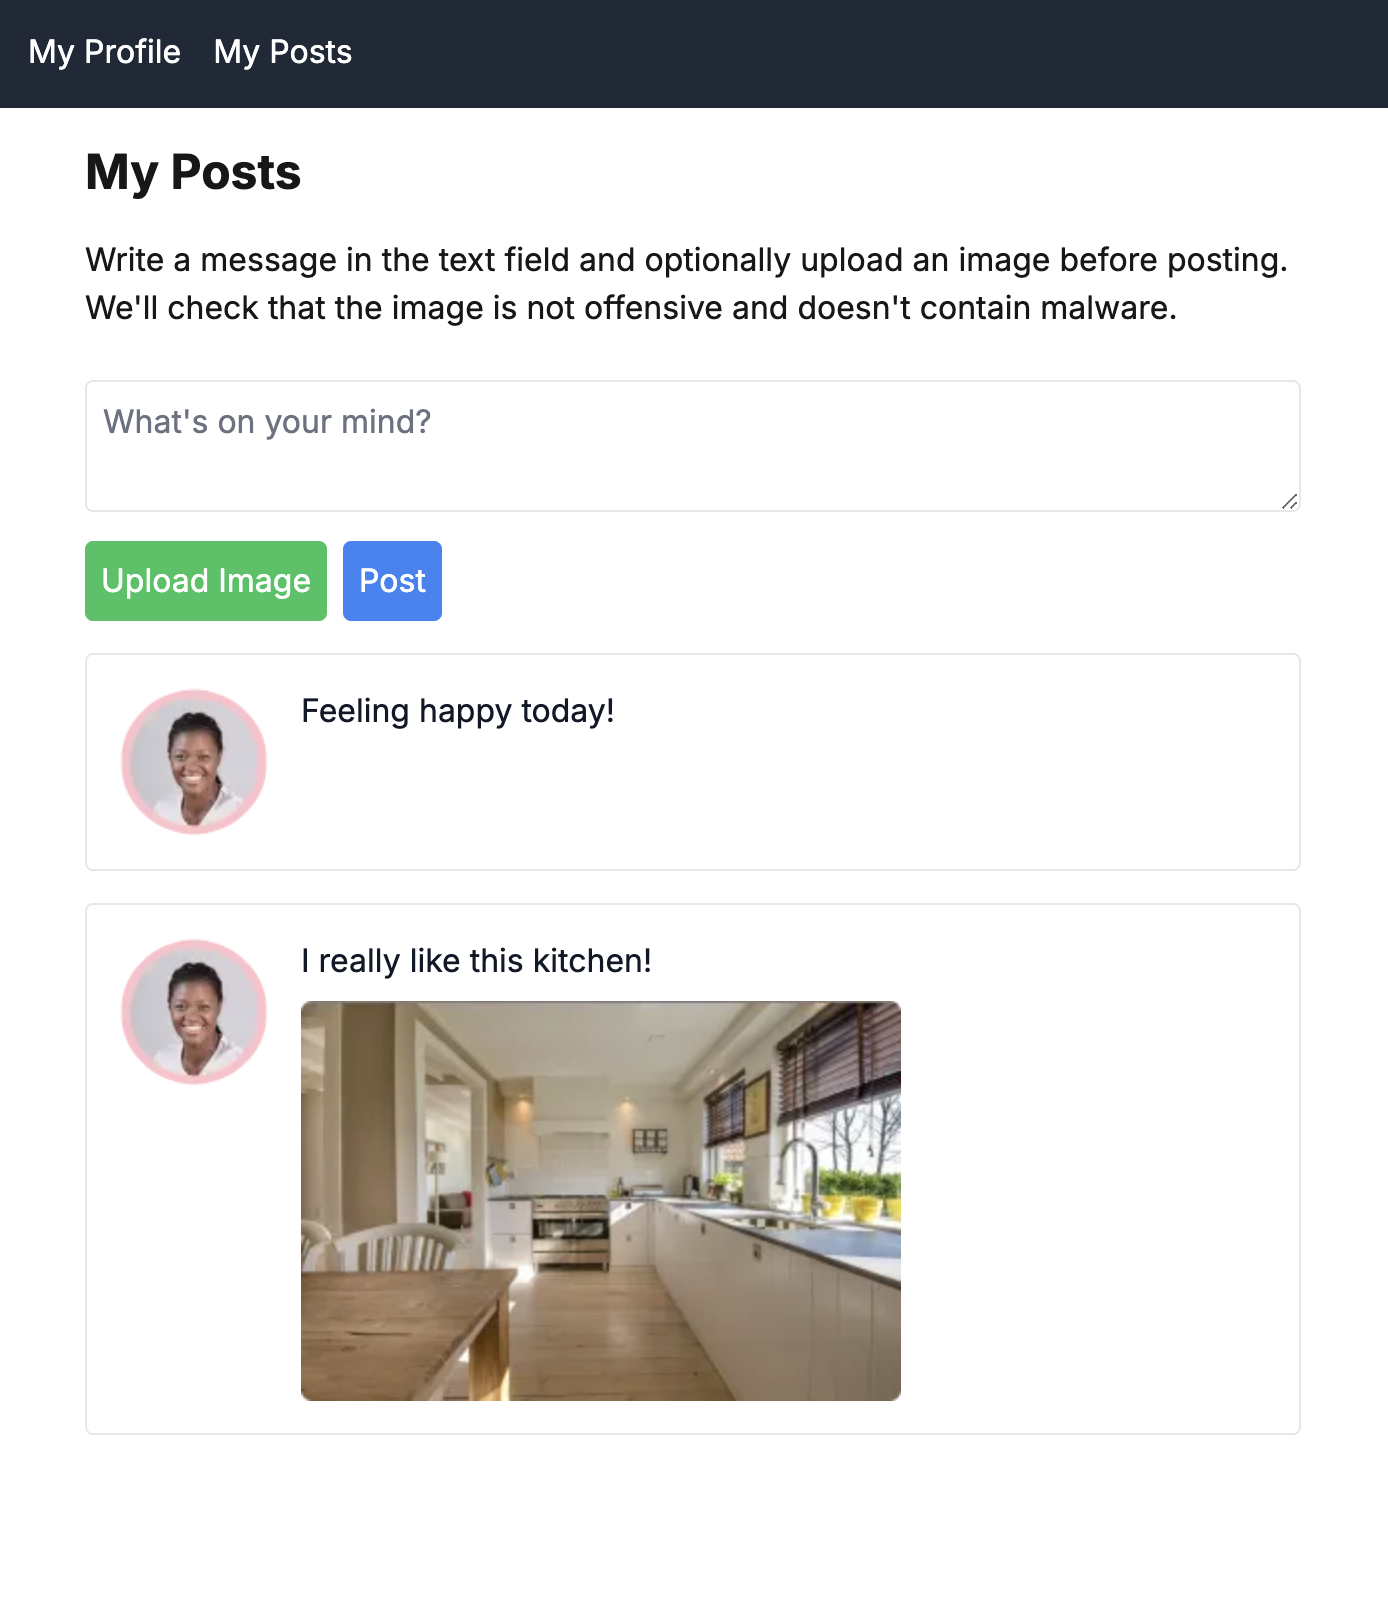
On the Posts page:
- The post is displayed against the profile picture, which is resized and made circular with an outline.
- The uploaded image, if there is one, is moderated for appropriate content and checked for malware before being displayed on the page.
- The post image is displayed with padding, if required, to show the whole image in a dedicated space.
Key Cloudinary features
Learn about how each of these Cloudinary features have been implemented in this app:
- Upload preset: the instructions for uploading images
- Upload widget: the method of uploading images
- Moderation and malware detection: ensuring uploaded images are appropriate and safe
- Quality analysis: analyzing and improving image quality
- Transformations and optimizations: modifying images on the fly
Try it out
Here's the app in action:
To run the app yourself:
- Clone or fork the GitHub repo.
- In app/config/cloudinary.ts, replace MY_CLOUD_NAME with your Cloudinary product environment cloud name.
- Register for the following add-ons (they both have free tiers):
- To try out your app locally, you need to set up a secure tunnel connecting the internet to your locally running application so that the webhooks sent by Cloudinary on upload are caught and handled by the app. You can use a tool such as Ngrok to do this. Otherwise, you need to deploy the app using a service such as Vercel. Whichever method you choose, make a note of your app's domain (for example,
a-b-c-d.ngrok-free.appora-b-c-d.vercel.app). By default, the app runs on port 3000. - Create an upload preset called ugc-profile-photo. (You can use a different name, but if you do, you also need update the
uploadPresetvalue in cloudinary.ts.) See instructions on how to configure your upload preset. - Ensure that the Notification URL in your upload preset is set to:
https://<your app's domain>/api/moderate - Upload an image to use as the default image (for example this image), and set its public ID to
avatar-pic. Alternatively, use an image that's already in your product environment, and change the value ofdefaultImagein cloudinary.ts to its public ID. -
If running locally, run:
then
Then open http://localhost:3000 in your browser to see the app running.
Upload preset configuration
To configure the upload preset:
- Log into your Cloudinary Console.
- Navigate to Settings > Upload > Upload Presets.
- Click Add Upload Preset.
- Configure each of the sections as shown below, then click Save:
General
| Parameter | Value | Meaning |
|---|---|---|
| Upload preset name | ugc-profile-photo |
The name of the upload preset. This must match the uploadPreset parameter used in the Upload widget configuration (set in cloudinary.ts). |
| Signing mode | Unsigned |
No signature is required for uploading assets using this upload preset. |
| Auto-generate an unguessable public ID value | true |
It's best to generate a random value to avoid conflicts if you have many users uploading their images to your product environment. |
The rest of the General settings can be set as you like.
Advanced upload preset settings
Transform
| Parameter | Value | Meaning |
|---|---|---|
| Incoming transformation | c_limit,h_1000,w_1000/fl_force_strip |
Limit the dimensions of the image to 1000 by 1000 pixels and strip embedded metadata associated with the image. |
Transform upload preset settings
Manage and Analyze
| Parameter | Value | Meaning |
|---|---|---|
| Retrieve quality analysis data | true |
Return quality analysis data in the upload response. |
Manage and analyze upload preset settings
Optimize and Deliver
| Parameter | Value | Meaning |
|---|---|---|
| Delivery type | Upload |
Make the image publicly available. |
Optimize and deliver upload preset settings
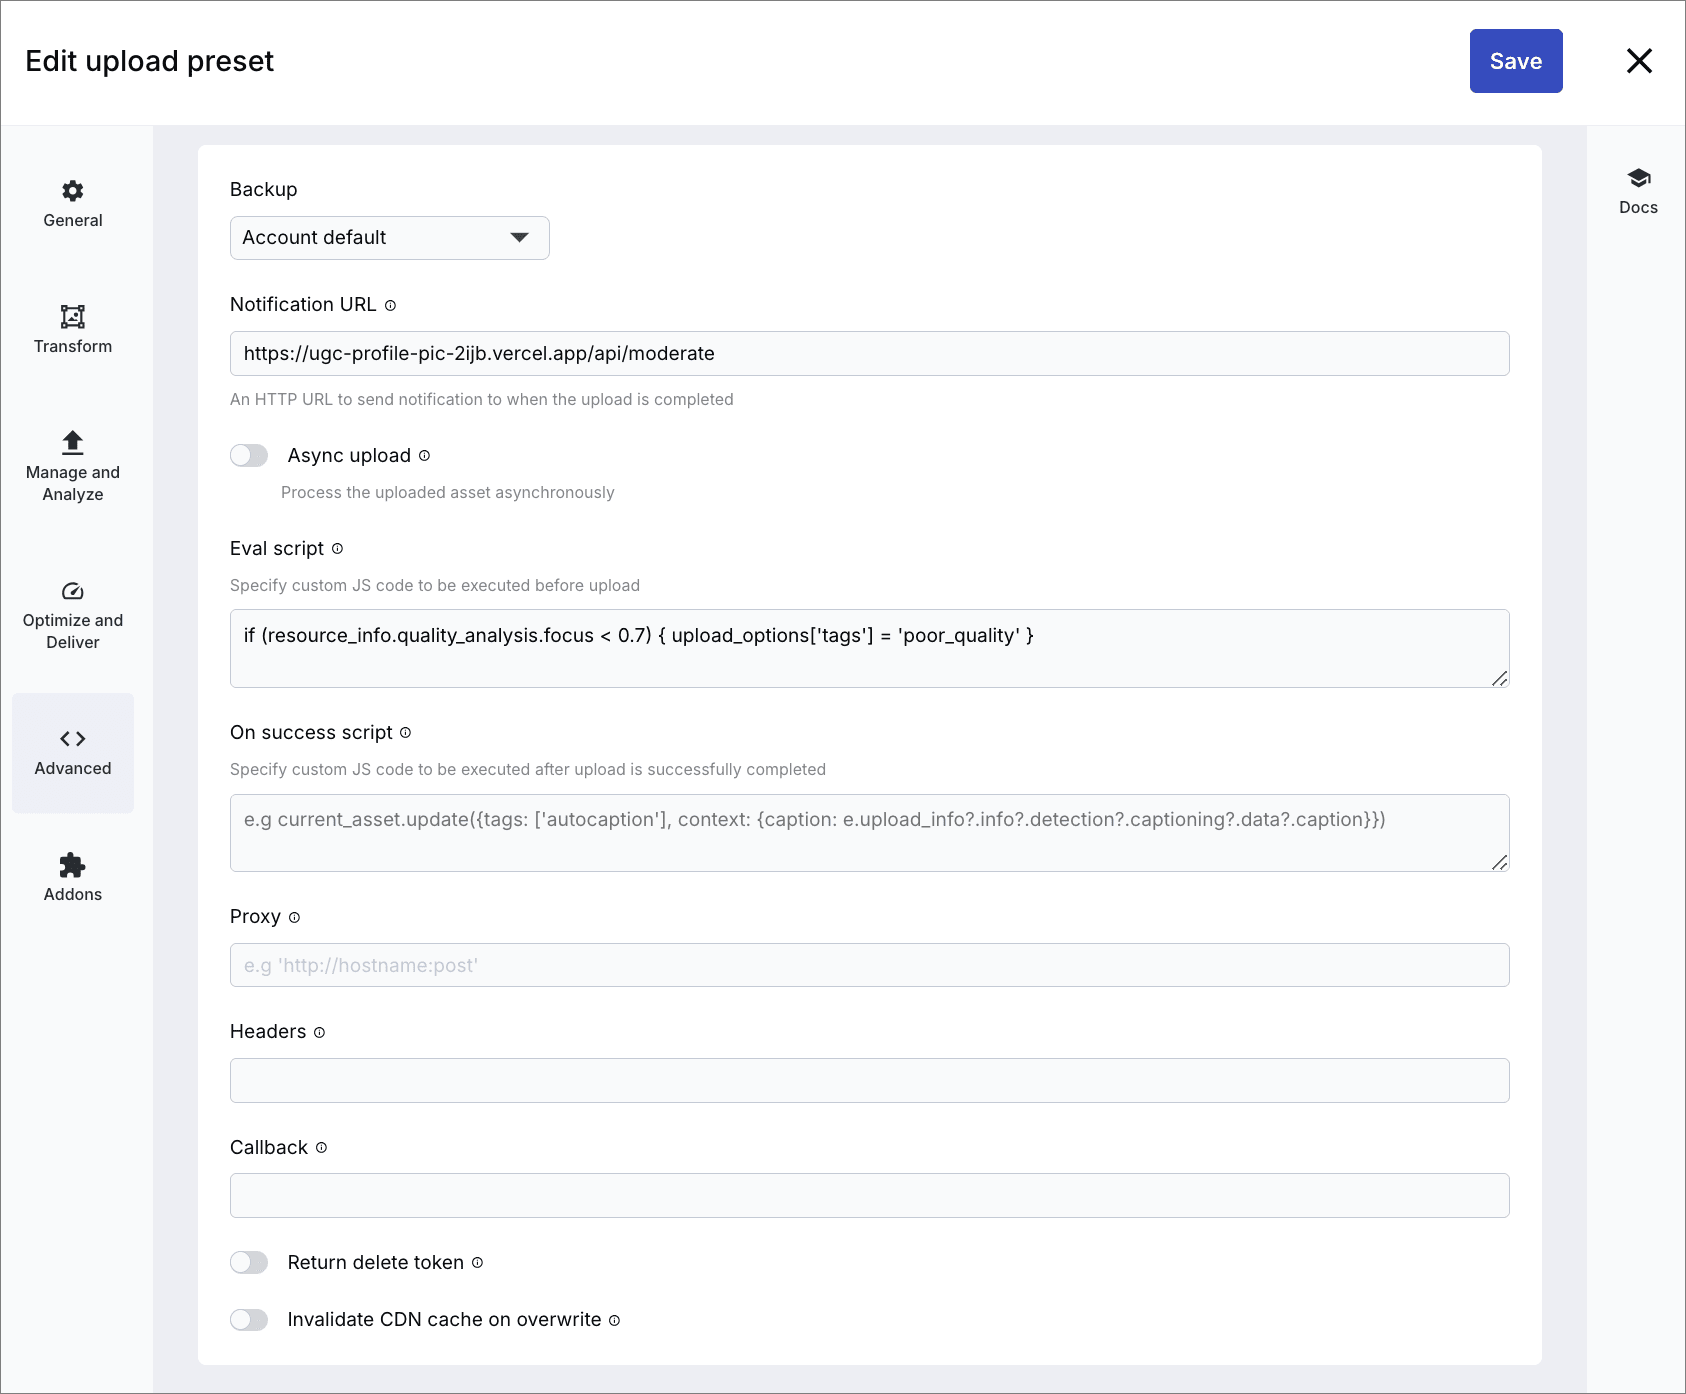
Advanced
| Parameter | Value | Meaning |
|---|---|---|
| Notification URL | https://<your app's domain>/api/moderate |
The API endpoint for your app. To try out your app locally, you need to set up a secure tunnel connecting the internet to your locally running application so that the webhooks sent by Cloudinary on upload are caught and handled by the app. You can use a tool such as Ngrok to do this. Otherwise, you need to deploy the app using a service such as Vercel. |
| Eval script | if (resource_info.quality_analysis.focus < 0.7) { upload_options['tags'] = 'poor_quality' } |
JavaScript code that checks the quality analysis and adds a poor_quality tag if the focus is less than 0.7. |
Advanced upload preset settings
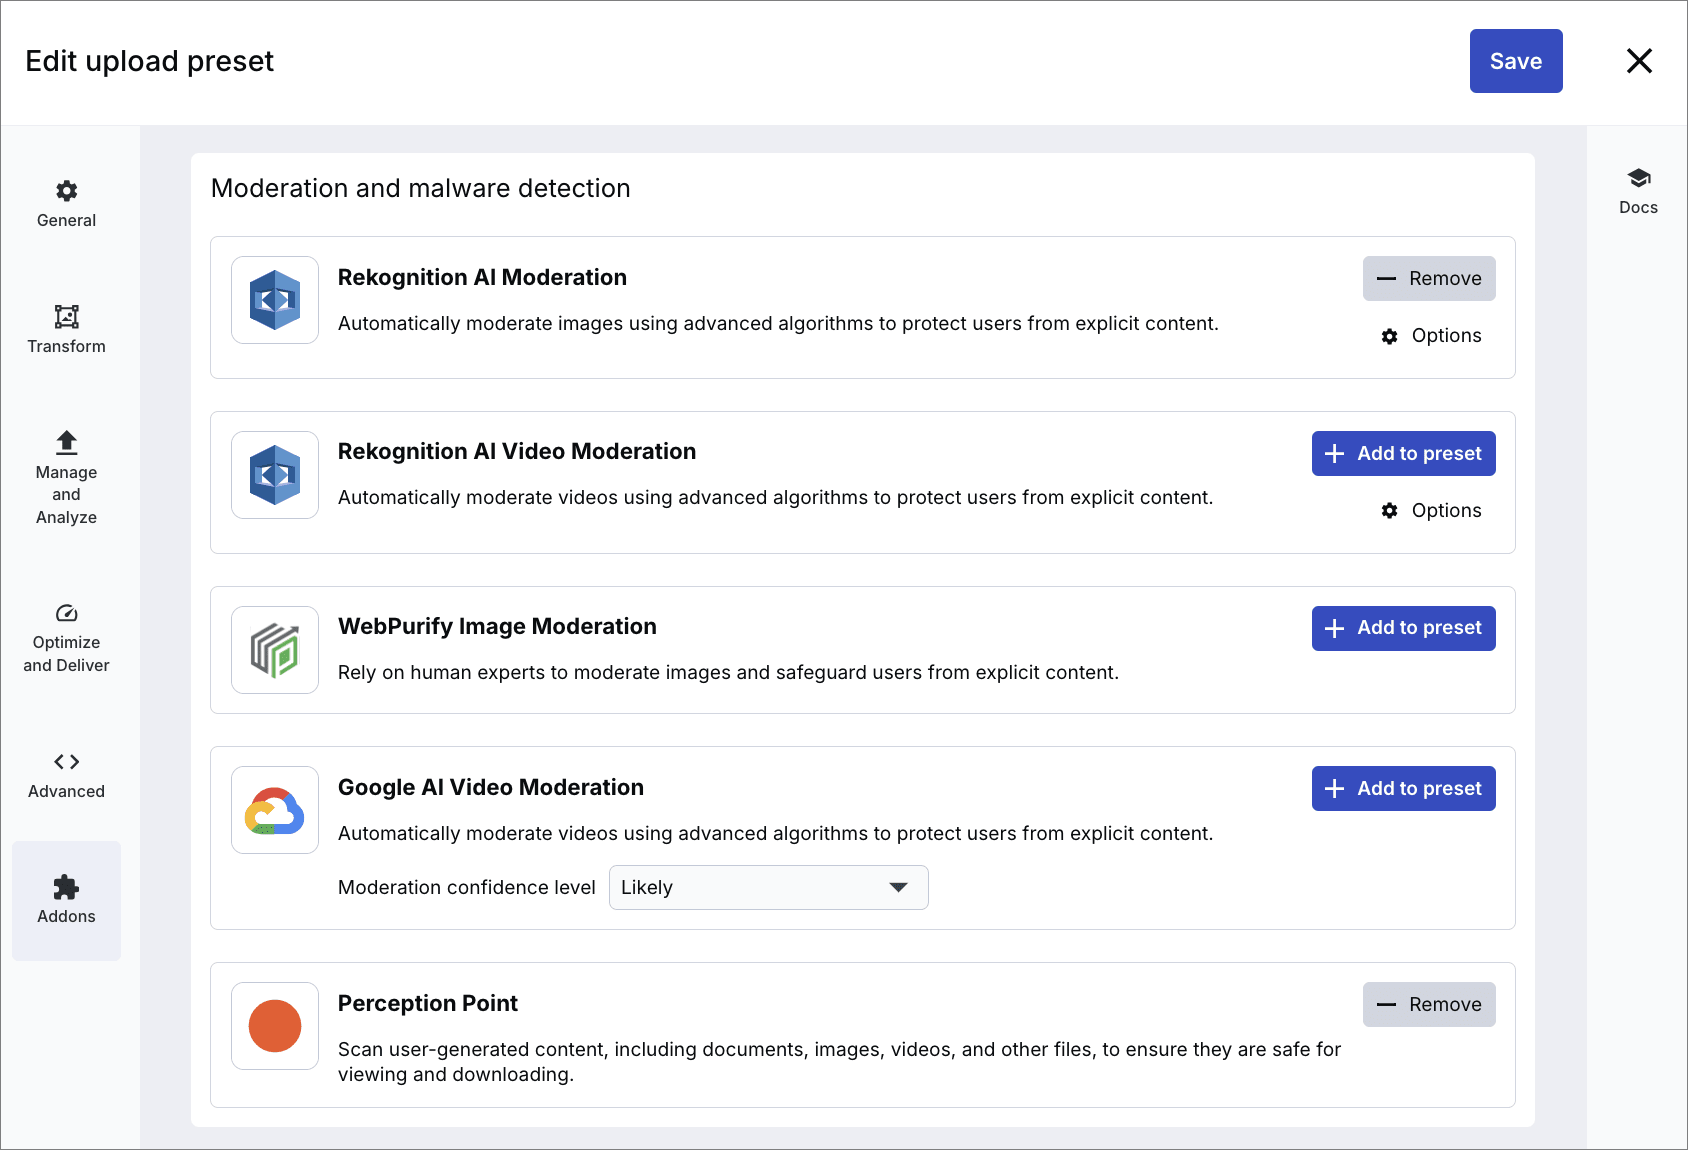
Addons
Add the Rekognition AI Moderation add-on. Click Options to optionally set thresholds for each type of moderation.
Add the Perception Point add-on.
Deep dive
If you want to learn how each of the features have been implemented in detail, expand the following sections: