Sunday, June 2, 2013
OpenCV ARM - Face Detect
Here's another application that uses opencv libraries in the Debian disto. It performs face detection using Haar cascade.
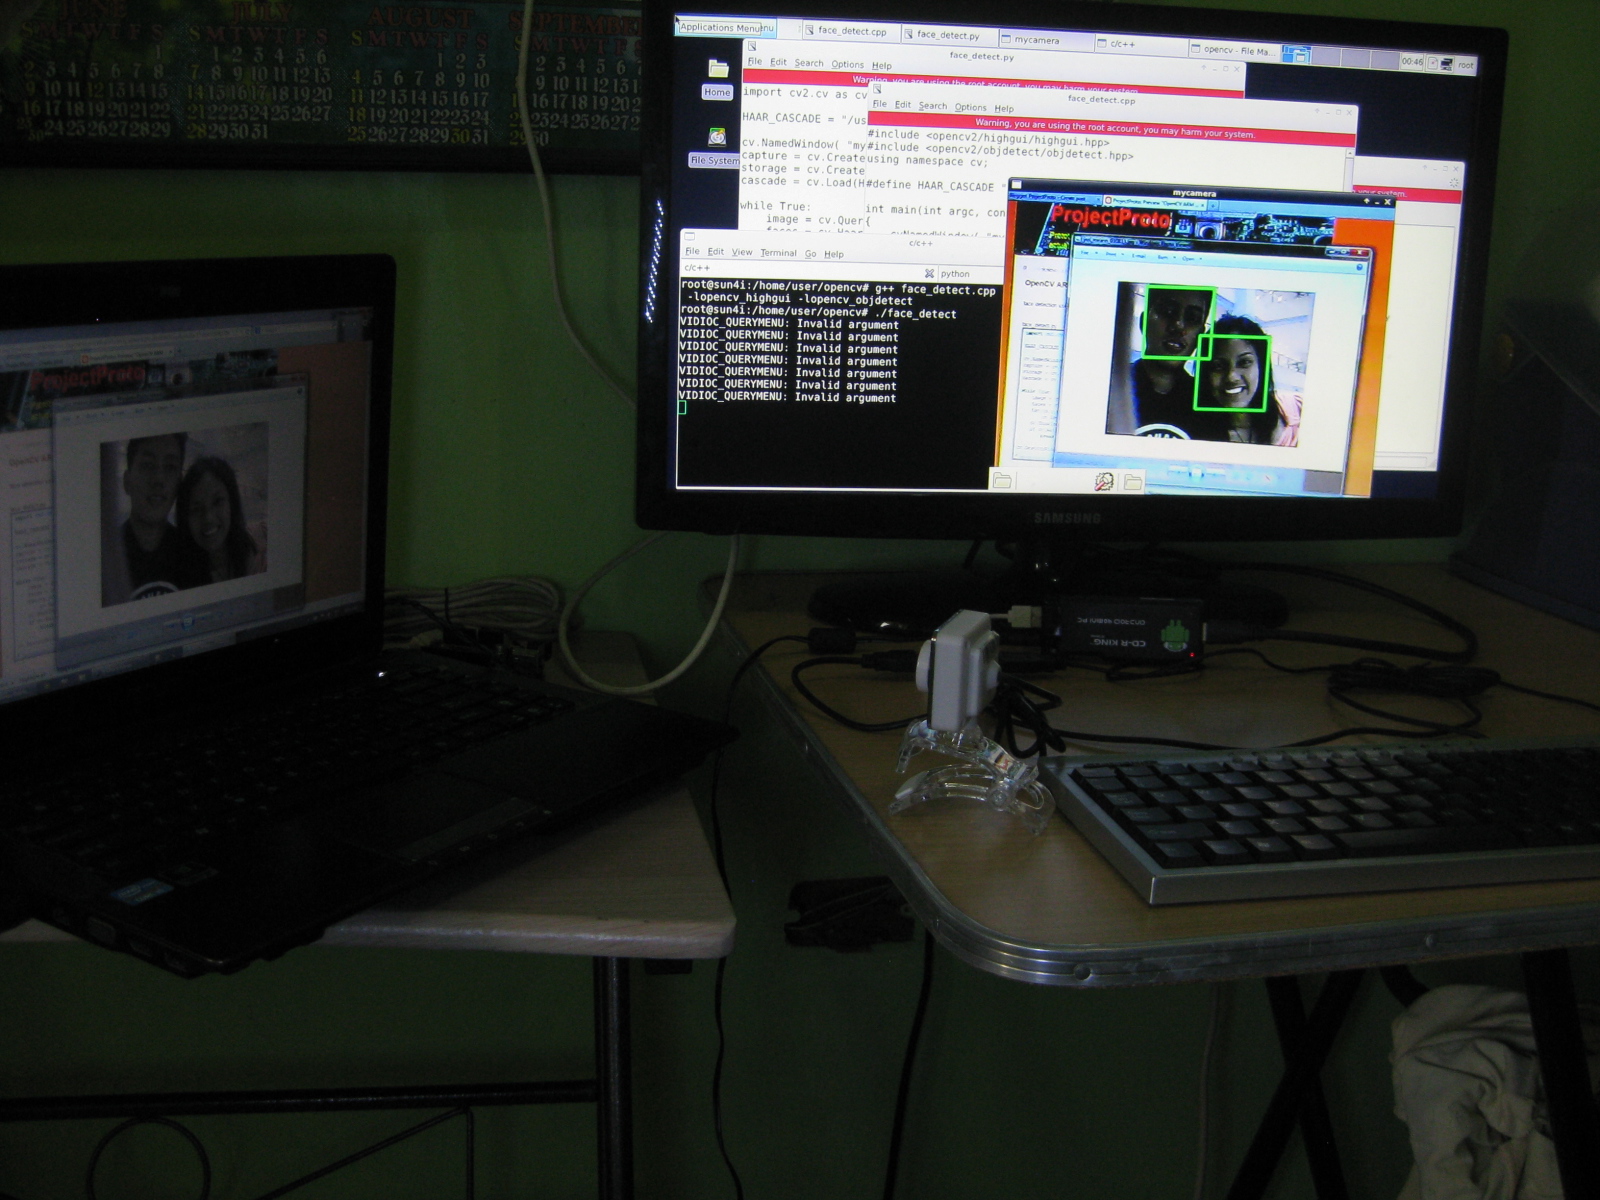
The code below continuously captures frames with a USB web-camera. (In this demo, I displayed a sample picture on a separate laptop but this will also work for actual faces). Using the input frames and a loaded Haar classifier cascade, vector of rectangles containing the detected faces is returned to the user. A bounding box is drawn to each face to show successful detection.
face_detect.py
import cv2.cv as cv
HAAR_CASCADE = "/usr/local/share/OpenCV/haarcascades/haarcascade_frontalface_default.xml"
cv.NamedWindow( "mycamera" )
capture = cv.CreateCameraCapture(0)
storage = cv.CreateMemStorage()
cascade = cv.Load(HAAR_CASCADE)
while True:
 image = cv.QueryFrame(capture)
 faces = cv.HaarDetectObjects(image, cascade, storage, 1.1, 3, cv.CV_HAAR_DO_CANNY_PRUNING, (100,100))
 for((x,y,w,h),i) in faces:
 cv.Rectangle(image, (x,y), (x+w, y+h), (0,255,0), 3)
 cv.ShowImage( "mycamera", image )
 if cv.WaitKey(5) > 0:
 break
cv.DestroyWindow( "mycamera" )
Below is the C/C++ equivalent of the above python script. (The code appears lengthy due to the comments and cleanup routines.)
face_detect.cpp
#include <opencv2/highgui/highgui.hpp>
#include <opencv2/objdetect/objdetect.hpp>
using namespace cv;
#define HAAR_CASCADE "/usr/local/share/OpenCV/haarcascades/haarcascade_frontalface_default.xml"
int main(int argc, const char ** argv)
{
 cvNamedWindow( "mycamera" /*, CV_WINDOW_AUTOSIZE*/); // create camera window, 1=CV_WINDOW_AUTOSIZE(default,the user cannot resize the window)
 CvCapture *capture = cvCreateCameraCapture(0); // start capturing frames from camera (i.e. /dev/video0 device)
 CvMemStorage *storage = cvCreateMemStorage(); // create new memory storage
 CvHaarClassifierCascade *cascade = (CvHaarClassifierCascade *)cvLoad(HAAR_CASCADE); // load frontal face detector
 while (1){
 IplImage *image = cvQueryFrame(capture); // grab and retrieve frame
 CvSeq *faces = cvHaarDetectObjects(image, cascade, storage, 1.1, 3, CV_HAAR_DO_CANNY_PRUNING, cvSize(100,100)); // find rectangular regions that contain faces
 for(int i=0; i < faces->total; i++){
 CvRect *r = (CvRect *)cvGetSeqElem(faces, i); // get bounding rectangle of the detected face
 cvRectangle(image, cvPoint(r->x, r->y), cvPoint(r->x + r->width, r->y + r->height), cvScalar(0,255,0), 3); // draw a green rectangle
 }
 cvShowImage( "mycamera", image ); // display image within window
 if (cvWaitKey(5) > 0) // press any key to exit
 break;
 }
 // cleanups
 cvReleaseHaarClassifierCascade( &cascade ); // release cascade
 cvReleaseMemStorage( &storage ); // release memory storage
 cvReleaseCapture( &capture ); // stop capturing/reading
 cvDestroyWindow( "mycamera" ); // end camera window
 return 0;
}
Saturday, June 1, 2013
OpenCV ARM - Hello World
Here is a sample application that utilizes OpenCV in my customized Debian disto. Sample codes are posted below. The demo simply displays images captured by the camera. This can be extended to utilize other opencv functions.
hello_camera.py
import cv2.cv as cv
cv.NamedWindow( "mycamera", 1 )
capture = cv.CreateCameraCapture( 0 )
while True:
 img = cv.QueryFrame( capture )
 cv.ShowImage( "mycamera", img )
 if cv.WaitKey(20) > 0:
 break
cv.DestroyWindow( "mycamera" )
Below is the C/C++ equivalent of the above Python script.
hello_camera.cpp
#include <opencv2/highgui/highgui.hpp>
using namespace cv;
int main( int argc, const char** argv )
{
 cvNamedWindow( "mycamera", 1 ); // create camera window
 CvCapture *capture = cvCreateCameraCapture( 0 ); // start capturing frames from camera (i.e. /dev/video0 device)
 while(1){
 IplImage* img = cvQueryFrame( capture ); // grab and retrieve frame
 cvShowImage( "mycamera", img ); // display image within window
 if( waitKey(20) > 0 ) // press any key to exit (interval=20ms)
 break;
 }
 // cleanups
 cvReleaseCapture( &capture ); // stop capturing/reading // not needed in python (?)
 cvDestroyWindow( "mycamera" ); // end camera window
 return 0;
}
---------------------------------------------------------------------------
- thanks to hilite.me for formating the codes. (best viewed with Firefox browser)
- webcam can also be tested with guvcview (Applications Menu->Multimedia->guvcview)
Debian Wheezy on SUN4I (Allwinner A10)
I purchased a mini android tv box available at cd-rking. The item is actually a re-branded BC218 (similar specs to MK802+). This connects to a hdmi monitor, and with a mouse and keyboard this can function as a mini computer. After some testing, I decided to customize a Debian image dedicated for OpenCV development.
download: Debian Wheezy armhf image (~164MB)
- Debian Wheezy w/ XFCE4 desktop (debootstrap log )
- Kernel 3.4.43 (6416f0bf9e32d0950ba6f768ac20228ce8940a79 ) [Linaro 4.7 ]
- natively build MALI GPU drivers
- natively build OpenCV 2.4.5 libraries (C/C++ and Python2.7 support)
- with build-essential (e.g. compiler) and python packages
instructions:
- needs at least 2G microSD card
- extract *.img file using p7zip or 7zip,
then use dd (Linux) or win32diskimager (Windows) to burn the image
- resize partitions (optional )
- root password: toor
notes:
- tested only on BC218; so the u-boot, script, and kernel may need to be modified to work for other boards)
- this Debian is intended only for opencv development, NOT for everyday use. There are other linux distro's that are more functional than this.
- no CedarX (VPU) libraries
- to keep the image size small: (1)there's no media player and no web browser included (wifi still works though); (2)remove docs, some locales, and /var/cache/ files.
- some kernel drivers in the default "sun4i_defconfig" were disabled. While, UVC, usb2serial, etc drivers were enabled for interfacing development.
--------------------------------------------------------------
update 06/09/13
Debian Wheezy armhf image V2
* with LXDE desktop
* apply some tweaks (may cause instability in the system!!!)
- increase dram clock to 432MHz
- increase default min cpu freq to 204MHz, default max to 1104MHz
- use tmpfs for "tmp" and "log" folders
* re-build opencv libraries
If interested only on uboot and kernel files, here's the archive.
You may also need to mod the device by adding heatsink.
'yus
Subscribe to:
Comments (Atom)