Tuesday, May 24, 2011
Making microphone work in Kubuntu Natty
After I switched to Kubuntu Natty 11.04, my microphone stopped working (especially in Skype). I tried to adjust the microphone settings in Phonon System Settings, but, besides having too many devices to choose from, that settings dialog seems to have a bug which prevents the preferences to being saved. Not to mention that there is no way to test the input device from that setting dialog!
Luckily, in that bug report I also found the solution to have microphone work!
The solution consists in installing the package pavucontrol, which provides a comfortable PulseAudio Volume Control dialog, which also gives you immediate feedback to see whether the microphone is working, and reduces the number of devices to choose from!
After you installed that package, Skype options dialog presents a button to open that volume control dialog
If you click the button you'll get the pavucontrol dialog, and in "Input Devices" tab you can choose the input device from the list and instantly check whether that's the right device: just speak in the microphone, and see whether the horizontal bar moves while you're speaking.
That's all! Now you're microphone is set correctly. :)
Thursday, January 13, 2011
Compile Linux Kernel in Ubuntu with KernelCheck (and Nvidia drivers)
I've always recompiled Linux kernel on all my Linux installations, starting from the kernel sources of the Ubuntu repositories. Then I've heard about the famous 200 lines kernel patch, that I wanted to try, but it doesn't seem to apply to ubuntu linux sources (or at least I had this impression), and I didn't want to try the alternatives.
Then I stumbled upon this nice article about using KernelCheck (which I didn't know) to compile the linux kernel (not from the ubuntu repositories):
a graphical user interface program designed to make the kernel-compiling process as easy as the click of a button. KernelCheck will fetch the latest information from http://www.kernel.org, which hosts the source packages for the Linux kernel, and ask the user which one they would like to compile into a .deb package (with the option of installing the kernel after the compilation).The article also applies the 200 lines patch, so I decided to give it a try! The articles shows a video, but I'd like to blog about my experience with some screenshots.
Most important, I decided to blog about my experience because of the Nvidia drivers I have on some of my Linux computers, since the first experience with KernelCheck and nvidia drivers was really bad. I think I found a solution to deal with these drivers, so that I can compile the kernel, the patch, and have nvidia drivers work without a problem :)
After you installed kernelcheck, and run it you'll have some screens, and first of all you must retrieve available kernel information:
Then I select the custom compilation
Now, you can select some options.
At this point, it is crucial
- NOT to select the reconfiguration of X server
- NOT to install the nvidia driver
- to select "apply custom patch to the kernel" (if you want to try the 200 lines patch)
- I prefer not to install the kernel package after compilation: I'll do that myself
After the download of the needed packages is finished, you'll get a terminal window where you can apply manually the patch (that you can download it from here), and apply it, as it is shown in the screenshot (then you need to close the terminal window)
Then, you'll get the chance to configure the kernel before compilation. Make sure you have all the options you need set (it looks like kernelcheck starts from the current configuration, so, for instance, the processor family is already set as your current configuration).
To enjoy the 200 lines kernel patch, you must enable "Automatic process group scheduling" under "General setup", as shown in the following screenshot:
Then, the compilation starts, and, you know, it might take some time (though for my computer, and configuration it takes less than 1 hour)
Then, you'll be suggested to reconfigure the X server... DON'T DO THIS, and answer no
Then, the kernel deb packages (-image and -headers) will be ready in /usr/src, and you can manually install them.
Note that, during the installation, the Ubuntu kernel utilities will smartly compile and configure the current nvidia modules for you!
Now, reboot and enjoy :)
P.S. I cannot swear my computer is faster now with the 200 lines kernel patch... but I have the impression it is :)
Monday, November 22, 2010
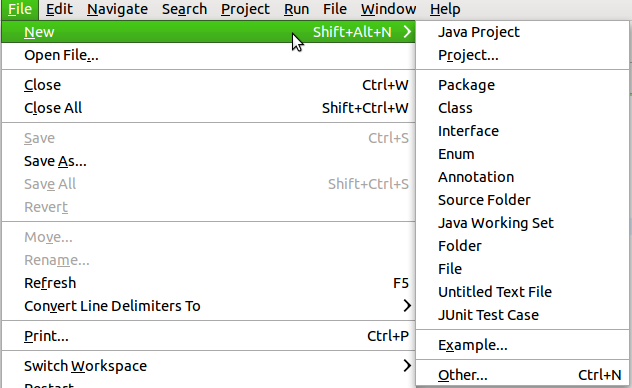
Eclipse icons in menus are not showing in Ubuntu Maverick Linux
I don't like Gnome and I usually use KDE, but on a specific computer I have to use Gnome, and I noted that after switching to Ubuntu Maverick, icons on eclipse menus were not showing anymore.
I asked on some newsgroups with no luck, then on IRC I was pointed to this bug, which solved my issue :)
You need to enable icons in menus with gnome configuration. You find some ways to do that on that bug report, but I simply ran gconf-editor on the command line, and enabled that checkbox:
Now my icons in menus are back :)
Friday, July 09, 2010
mounting none on /dev failed: No such device
If you're experiencing this error message at boot in Linux (e.g., after you recompiled the kernel in Ubuntu Lucid)
mounting none on /dev failed: No such device
don't be scared, the boot will continue and there'll be no problem (at least, I read in some posts); I never experienced problems even with this error at boot.
But if you want to get rid of it, just make sure that you have
CONFIG_DEVTMPFS=y
in your .config file of your kernel source directory.
Pubblicato da betto a 3:00 PM 3 commenti
Friday, June 18, 2010
Building Qt-Mobility in Ubuntu
Lately I started to try to develop applications for the Nokia N900, and the Maemo platform uses my beloved framework Qt :)
In particular, Nokia started to develop the Qt-Mobility Framework. Quoting from their white paper:
The Qt Mobility Project presents a collection of related software frameworks and interfaces. The objective being to deliver new Qt APIs for mobile application developers. Using these new APIs, developers will be able to create cross-platform applications targeting Maemo, Symbian and other platforms. This suite of features also has components that will be desirable to all users, not just those with mobile devices, so Mobility has advantages even for the desktop user.Thus, I wanted to try this project also on my Desktop (after all the intent of this framework is cross-platform development), and tried to compile qt-mobility on my Ubuntu/Kubuntu desktop. Unfortunately, I experienced many problems which now I seem to have solved, thus I'd like to share the steps to build qt-mobility from sources.
First of all, when installing qt-mobility after compilation, some files will be created in your current Qt installation. Thus, since I wouldn't want to spoil my qt installation from ubuntu packages, which is installed in system path, I downloaded the new qt framework 4.6.3 from the Nokia download site, and installed it in a path of my home: ~/usr/local/Trolltech/qtsdk-2010.03.
Then, I installed some packages that are useful to build qt-mobility and to enjoy media contents such as mp3 and videos, relying on gstreamer (not all these packages may be necessary, but after some tests, at least these packages will make things work):
sudo apt-get install libasound2-dev libbluetooth-dev libgstreamer0.10-dev libgstreamer-plugins-base0.10-dev network-manager-dev libxv-dev gstreamer-tools gstreamer0.10-plugins-base gstreamer0.10-ffmpeg w32codecs ubuntu-restricted-extras gstreamer0.10-plugins-good freeglut3-devThen, you need to get the sources of qt-mobility, and I got them from the git repository
git clone git://gitorious.org/qt-mobility/qt-mobility.git
However, you may want to get the stable sources (e.g., from qt-mobility download).
Since I'm a big fan of "shadow builds" which won't spoil your source directory, I built qt-mobility in another directory of my home, separate from the directory where I have the sources of qt-mobility (in this example the sources are in ~/install/qt-mobility): ~/build/qt-mobility/qt-4.6.3 (I specified the qt version I'm building qt-mobility with, since I may want to experiment with different qt versions):
- cd ~/build/qt-mobility/qt-4.6.3
- PATH=~/usr/local/Trolltech/qtsdk-2010.03/qt/bin:$PATH ~/install/qt-mobility/configure -examples -prefix ~/usr/local/Trolltech/qt-mobility> output.txt
Once the configuration step is successful, you can start building qt-mobility and then install it:
- make
- make install
- install -m 644 -p /home/bettini/build/qt-mobility/qt-4.6.3/features/mobility.prf /home/bettini/usr/local/Trolltech/qtsdk-2010.03/qt/mkspecs/features/
- install -m 644 -p /home/bettini/build/qt-mobility/qt-4.6.3/features/mobilityconfig.prf /home/bettini/usr/local/Trolltech/qtsdk-2010.03/qt/mkspecs/features/
Now, you can test your qt-installation by running an example (which was built and installed), for instance the player demo or the weather demo:
- ~/usr/local/Trolltech/qt-mobility/bin/player
- ~/usr/local/Trolltech/qt-mobility/bin/weatherinfo_with_location
Now, let's try to see whether we're able to use qt-mobility in our programs.
We'll try to compile a very simple qt program using a class from the qt-mobility framework (QVideoWidget), though we won't do anything with that (just to see whether we can build the application).
here's the files of our project
myvideowidget.pro
QT += core gui

TARGET = myvideowidget
TEMPLATE = app


SOURCES += main.cpp\
 mainwindow.cpp

HEADERS += mainwindow.h

CONFIG += mobility
MOBILITY = multimedia
mainwindow.h
#ifndef MAINWINDOW_H
#define MAINWINDOW_H

#include <QMainWindow>

class QVideoWidget;
class QMediaPlayer;

class MainWindow : public QMainWindow
{
 Q_OBJECT

public:
 explicit MainWindow(QWidget *parent = 0);

private:
 QVideoWidget *videoWidget;
 QMediaPlayer *player;
};

#endif // MAINWINDOW_H
mainwindow.cpp
#include <QMediaPlayer>
#include <QVideoWidget>
#include <QTextEdit>

#include "mainwindow.h"

MainWindow::MainWindow(QWidget *parent) :
 QMainWindow(parent)
{
 videoWidget = new QVideoWidget(this);

 setCentralWidget(videoWidget);
}
main.cpp
#include <QtGui/QApplication>
#include "mainwindow.h"

int main(int argc, char *argv[])
{
 QApplication a(argc, argv);
 MainWindow w;
 w.show();
 return a.exec();
}
now, you should run the qmake of your qt installation you've used to build qt-mobility, thus
- ~/usr/local/Trolltech/qtsdk-2010.03/qt/bin/qmake myvideowidget.pro
- g++ -c -pipe -O2 -Wall -W -D_REENTRANT -DQT_NO_DEBUG -DQT_OPENGL_LIB -DQT_GUI_LIB -DQT_NETWORK_LIB -DQT_CORE_LIB -DQT_SHARED -I../../../../usr/local/Trolltech/qtsdk-2010.03/qt/mkspecs/linux-g++ -I../../myvideowidget -I../../../../usr/local/Trolltech/qtsdk-2010.03/qt/include/QtCore -I../../../../usr/local/Trolltech/qtsdk-2010.03/qt/include/QtNetwork -I../../../../usr/local/Trolltech/qtsdk-2010.03/qt/include/QtGui -I../../../../usr/local/Trolltech/qtsdk-2010.03/qt/include/QtOpenGL -I../../../../usr/local/Trolltech/qtsdk-2010.03/qt/include -I/home/bettini/usr/local/Trolltech/qtsdk-2010.03/qt/include/QtMultimediaKit -I../../../../usr/local/Trolltech/qt-mobility/include -I../../../../usr/local/Trolltech/qt-mobility/include/QtMultimediaKit -I/usr/X11R6/include -I. -I../../myvideowidget -I. -o mainwindow.o ../../myvideowidget/mainwindow.cpp
- g++ -Wl,-O1 -Wl,-rpath,/home/bettini/usr/local/Trolltech/qtsdk-2010.03/qt/lib -Wl,-rpath,/home/bettini/usr/local/Trolltech/qt-mobility/lib -o myvideowidget main.o mainwindow.o moc_mainwindow.o -L/home/bettini/usr/local/Trolltech/qtsdk-2010.03/qt/lib -L/usr/X11R6/lib -L/home/bettini/usr/local/Trolltech/qt-mobility/lib -lQtMultimediaKit -lQtOpenGL -L/home/bettini/usr/local/Trolltech/qtsdk-2010.03/qt/lib -L/usr/X11R6/lib -lQtGui -lQtNetwork -lQtCore -lGLU -lGL -lpthread
Pubblicato da betto a 11:05 AM 2 commenti
Etichette: kubuntu, maemo, qt, qt-mobility, ubuntu
Tuesday, May 11, 2010
Eclipse internal Web Browser in Ubuntu Lucid
After switching to Ubuntu Lucid I noted that in my eclipse php installation the internal web browser was not working anymore since it was lacking some mozilla libraries.
In that case, it is enough to install the current xulrunner:
sudo apt-get install xulrunner-1.9.2
and the internal web browser in eclipse will work again! :)
Pubblicato da betto a 9:14 PM 1 commenti
Monday, May 03, 2010
Package php-doc missing in Ubuntu Lucid
After installing the new Ubuntu Lucid I discovered that the package php-doc is not available anymore. Since I often work offline, having the php documentation installed to be browsed offline is a must for me.
It looks like for the moment that package is not available due to build failures.
Fortunately, the package for karmic can be installed without any problem, and you can download it from here. :)
Friday, August 07, 2009
Huawei E1692 in Linux Ubuntu Jaunty
I've just tried this Internet device, HUAWEI E1692 with Linux Ubuntu Jaunty, and basically everything worked out fine smoothly. The Internet connection can be established either with the NetworkManager Gnome applet, or using the application that comes with the device. Linux is officially supported with the provided drivers, and basically the installation works fine, thought the instructions provided are not completely correct...
As for the installation, you need to insert the usb device, and the first time, it is recognized as a USB memory storage; you can then access the data stored in the device, where you find a folder with the drivers and the installation script.
Since the installation requires root privileges it is required to run the install script in the Linux folder using the terminal:
cd /media/Alice\ MOBILE\ HW/Linux
sudo ./install
As suggested in this thread, it is better to specify the installation path, even though you're OK with the default one, by simply inserting the full path. The installation should then succeed
Now, you should be able to setup a connection with NetworkManager applet (actually I had another connection setup for the same operator, thus I could simply reused that one).
Now, an icon should be put in your desktop to use the application that ships with the device; however, I couldn't connect using that application link, probably because the application requires root privileges... but it works fine if I start it from a terminal
cd /usr/local/Alice_MOBILE_E1692/
sudo ./MobilePartner
and then you should be able to connect
The nice thing of this application is that you can keep track of your traffic
and you can send SMSs and access your addressbook
Friday, May 08, 2009
Goodbye ATI, welcome NVIDIA
I recently bought a new desktop, a slim one: the s3530.it HP Pavilion slimline, which I've really enjoyed since the very first moment! It is very small, compact, silent, and it provides basically everything!
When I bought it I noticed that it was endorsed with an ATI graphical card, but I said to myself "ATI? Never owned one... but it is well supported in Linux as far as I remember..." Gosh I was quite wrong!
If supported means that you need to get stuck with 2d or experience very sloooow motions in 3d then, it is right, it is supported, otherwise... :'(
I had always had nice experiences with Nvidia, and I didn't want to give up compiz special effects (after all I have a powerful desktop!), so after a quite hard research to find someone selling an Nvidia lowprofile graphic card, I substituted that crap of ATI with an Nvidia GE-FORCE 8400 GS graphical card, and now everything works like magic, with a very fluent graphic!
Of course, Ubuntu provides the driver for that! Well it did it also for ATI, but that driver really sucks!
I'll never buy another computer again if endorsed with an ATI, this is for sure! :-)
Saturday, April 11, 2009
GPRS connection in Ubuntu Jaunty
I've been using this beta version of Ubuntu Jaunty for a few days now, and today I wanted to establish a GPRS/GSM connection with my Nokia, using a USB cable. I had done this in my other Kubuntu distribution, and I only needed to set the parameters right in kppp.
This time I had a very pleasant surprise: as soon as I connected the USB cable, a pop window showed up:
after pressing Forward:
it already had all the parameters I needed, I just had to select the right voices in the Country and Provider, and I'm on-line!
Well done developers :-)
Pubblicato da betto a 3:08 PM 1 commenti
Sunday, April 05, 2009
Ubuntu Jaunty 9.04 beta on a Dell Latitude D630
I've been using this laptop, a Dell Latitude D630 for more than one year now, and I've always used Kubuntu (but always up to 8.04). Today, I decided to give a try to Ubuntu Jaunty 9.04 (still in beta); I preferred Ubuntu instead of Kubuntu because the same version of Kubuntu has a bug at the end of the installation process which does not let you decide whether to install the boot loaded on a specific partition instead of the MBR.
I tested the system live first, and experienced no problems. Thus, I installed it on the hard disk (on another partition, since I'm still keeping the kubuntu 8.04 installation).
The first nice thing I noticed was that now it's much easier to select your time zone, and the Region and City lists are neater (you can select the time zone with a few clicks now).
Also the suggestion of the keyboard layout works fine!
Then we come to the partitioning step:
I also specified to mount my other linux installation in a specific directory
The installation also offers the possibility of importing existing accounts (note that it detected windows and other Linux installations), but I preferred not to.
Then, before starting the installation...
remember to click on the advanced button, to setup the boot loader as you prefer, otherwise it will be installed on the MBR.
Now, since I already have grub installed (from my main kubuntu 8.04 installation), and want to keep that that way, I chose to install the ubuntu boot loader on the first sector of the installation partition (in my case (hd0,5) or /dev/sda6):
Now, I'm read to start the installation:
Of course, I had to change the grub menu.lst file of my main linux kubuntu 8.04 installation in order to add a menu item to boot this new Linux installation:
title Ubuntu JauntyBy selecting this grub menu item, I can boot the new Jaunty installation.
root (hd0,5)
chainloader +1
The first impression was really good! Everything seems to work fine: ethernet (Broadcom Corporation NetXtreme BCM5755M Gigabit Ethernet PCI Express (rev 02)), wireless (Network controller: Intel Corporation PRO/Wireless 3945ABG [Golan] Network Connection (rev 02)), bluetooth, graphic card (Intel Corporation Mobile GM965/GL960 Integrated Graphics Controller (rev 0c)) with special effects on!
It also looks like the infamous bug concerning too many load/unload cycles is not there anymore!
Stay tuned, as I'll keep this post up to date with new information :-)
Pubblicato da betto a 2:57 PM 9 commenti