| sub | I don't know what __ando_about_check is | |
| .gitignore | Initial commit | |
| flake.nix | update config | |
| README.md | Initial commit | |
NixOS Installation: A GitHub-Centric Flakes Workflow
This guide details a modern, reproducible method for installing NixOS using Flakes. The core philosophy is to use a personal GitHub repository as the "single source of truth" for your entire system configuration. This approach ensures that your system setup is version-controlled, easily shareable, and can be reliably reproduced on any hardware.
Key Advantages of This Approach
🏗️ Architecture & Design
- Single Source of Truth: Complete system state managed through GitHub repository
- Clean Directory Separation: Working directory isolated from Git repository for optimal workflow
- Pure Configuration Paradigm: Eliminates configuration.nix to prevent conflicting management approaches
- Clean Tree Structure:
treecommand shows only Nix files, not Git's complex directory structure
🔧 Development Experience
- Modern Editor Compatibility: Full VSCode/IDE support through user-space configuration placement
- Minimal sudo Usage: Daily workflow operates without elevated privileges
- One-Command Synchronization: Complete configuration sync with single rsync command
🔒 Security & Operations
- Dual Repository Strategy: Supports both private repos (with password hash) and public repos (with dummy hash)
- Atomic Configuration: System remains stable if build fails, with immediate testing capability
- Complete Reproducibility: Identical environment deployment across different hardware
🎯 Practical Benefits
- Seamless Inheritance: New installations automatically inherit latest configuration
- Version-Controlled Infrastructure: Full system history and rollback capabilities
- Long-term Maintainability: Sustainable workflow for ongoing system evolution
Part 1: Preparation
1.1. Create Your Flakes Repository
First, generate your own configuration repository from a template.
-
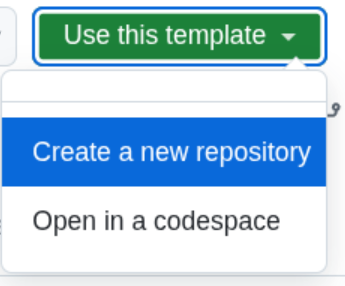
Click "Use this template" -> "Create a new repository" to create your own copy, which will be at:
https://github.com/GITHUB_USER_NAME/flakes-git
(Reference: Creating a repository from a template)
-
Repository Privacy Settings: Since your configuration will include a password hash string (not the password itself, of course), you should make this repository private. Alternatively, if you prefer a public repository, you can replace the password hash with a dummy string before each git commit (detailed in the workflow section below).

1.2. Prepare Live ISO Media
Download the NixOS installer from the official website: https://nixos.org/download
You can use either the Graphical (GNOME) ISO or the Minimal ISO. Since this guide does not use the graphical installer, either will work. However, the graphical version provides a full desktop environment, which is convenient for partitioning with GParted and setting up wireless networks.
Part 2: Installation Process
2.1. Boot from Live ISO
Boot your machine from the USB drive. Once on the desktop or command line, connect to the internet (and connect your Bluetooth keyboard, if needed).
2.2. Disk Partitioning and Mounting
Use a partitioning tool like GParted (available in the graphical ISO) or command-line tools (gdisk, fdisk) to prepare your disk.
Example for a UEFI System:
-
/dev/nvme0n1p1: EFI System Partition (ESP), 512MB, FAT32,boot&espflags. -
/dev/nvme0n1p2: Root (/) Partition, remaining space, ext4 (or btrfs, etc.). -
/dev/nvme0n1p3: SWAP Partition, e.g., 16GB, linux-swap.
Once partitioned, format and mount the filesystems.
# Format the partitions (skip if done in GParted)
# sudo mkfs.fat -F 32 /dev/nvme0n1p1
# sudo mkfs.ext4 /dev/nvme0n1p2
# sudo mkswap /dev/nvme0n1p3
# Mount the partitions
sudo mount /dev/nvme0n1p2 /mnt
sudo mkdir -p /mnt/boot
sudo mount /dev/nvme0n1p1 /mnt/boot
sudo swapon /dev/nvme0n1p3
2.3. Clone Your Flakes from the GitHub Repository
Create the necessary directories on the target disk and clone your repository. Replace USER and GITHUB_USER_NAME with your own details.
For Private Repositories:
Choose one of the following methods to access your private repository:
Method 1: Personal Access Token (Recommended)
sudo mkdir -p /mnt/home/USER/flakes
cd /mnt/home/USER
# Replace TOKEN with your GitHub Personal Access Token
sudo git clone https://GITHUB_USER_NAME:TOKEN@github.com/GITHUB_USER_NAME/flakes-git
🔑 Steps to Obtain a Token
-
Sign in to GitHub First, sign in to your GitHub account in your web browser.
-
Navigate to Settings Click on your profile picture in the top-right corner, and select [Settings] from the dropdown menu.
-
Go to Developer Settings In the left-hand menu, scroll all the way down and click on [Developer settings].
-
Select Personal access tokens Next, click on [Personal access tokens], and then select [Tokens (classic)].
-
Generate a new token Click the [Generate new token] button, and from the menu that appears, choose [Generate new token (classic)].
-
Configure the token
- Note: Give your token a descriptive name so you know what it's for (e.g., "flakes-clone-token").
- Expiration: Set an expiration date for the token. For security, it's recommended to choose a specific duration like 30 or 90 days instead of "No expiration."
- Select scopes: Choose the permissions for the token. To simply
git clonea private repository as in your command, you only need to check thereposcope.
-
Generate and copy the token Scroll to the bottom of the page and click the [Generate token] button.
Your new token (a string starting with
ghp_) will be displayed. This token will only be shown once. Be sure to click the copy icon next to it and save it in a secure place. You will not be able to see it again after you leave the page.
Important Notes ⚠️
- Treat your token like a password. Never share it with anyone or commit it to a public repository.
- Paste the token you copied into the
TOKENplaceholder in your command to run it successfully.
- Paste the token you copied into the
Method 2: USB Transfer
# Pre-clone the repository on another machine and copy to USB
# Then copy from USB to target system
sudo mkdir -p /mnt/home/USER/flakes
cd /mnt/home/USER
sudo cp -r /media/usb/flakes-git ./
For Public Repositories:
sudo mkdir -p /mnt/home/USER/flakes
cd /mnt/home/USER
sudo git clone https://github.com/GITHUB_USER_NAME/flakes-git
2.4. Prepare the Build Directory
At this point, your user's home directory on the target disk contains the following structure:
/mnt/home/USER/
├── flakes/ # Build directory (will be created)
└── flakes-git/ # Version-controlled repository (cloned)
Now, copy only the essential Nix files from your cloned git repository to your build directory.
sudo rsync -av --exclude '.*' --exclude 'README.md' /mnt/home/USER/flakes-git/ /mnt/home/USER/flakes/
Note on Directory Separation: We create two distinct directories for a clear and deliberate reason:
-
/mnt/home/USER/flakes-git/: Contains the complete Git repository structure, including hidden management files and documentation./mnt/home/USER/flakes-git/ ├── flake.nix ├── .git/ ├── .gitignore ├── README.md └── sub/ -
/mnt/home/USER/flakes/: Contains only the "pure" Nix files required for the build. Thersynccommand with--exclude '.*'filters out all dotfiles (.git/,.gitignore) and--exclude 'README.md'filters out documentation files, leaving only the essential configuration:/mnt/home/USER/flakes/ ├── flake.nix └── sub/
This separation prevents Nix from processing unintended files from your Git history and documentation, making the build environment cleaner and more predictable.
2.5. Configure Your Build Directory
Now, edit your core configuration file inside the build directory (flakes), not the Git repository directory.
sudo nano /mnt/home/USER/flakes/flake.nix
Important Security Note: We edit the configuration in the build directory (~/flakes) rather than the Git repository directory (~/flakes-git) to avoid accidentally committing sensitive information like password hashes to version control.
Configuration Based on Installation Type
The configuration process depends on whether this is your first installation or a subsequent one:
A) First Installation from Template: If this is your first time using the template, all user information will be placeholder values. You need to configure everything:
let
 # --- System Hostname ---
 hostname = "nixos"; # e.g. "my-laptop"
 # --- System Architecture ---
 system = "x86_64-linux";
 # --- NixOS Version ---
 stateVersion = "25.05";
 # --- User Information ---
 username = "USER"; # Your desired username
 passwordHash = "PASSWORD_HASH"; # Your generated password hash
 # --- Git Information ---
 gitUsername = "Your Git Name";
 gitUseremail = "your.email@example.com";
B) Subsequent Installation (Inheriting Previous Configuration):
If you've previously customized your repository, most settings will already be configured. The only potential action required is to handle the password hash.
You should check its status:
-
If a valid hash has been inherited from the previous setup, no further action is needed.
-
However, if it remains as a placeholder, you must set a new password hash at this stage.
let
 # Most settings inherited from previous configuration
 # Only update what's necessary:
 passwordHash = "PASSWORD_HASH"; # Generate new hash for this installation
Generating Your Password Hash
To generate the PASSWORD_HASH, open a new terminal and run this one-liner. It asks for a password twice and only outputs the hash if they match.
echo -n "Password: "; read -s pass1; echo; echo -n "Confirm: "; read -s pass2; echo; [ "$pass1" = "$pass2" ] && echo "$pass1" | mkpasswd -m sha-512 -s || echo "Passwords do not match"
Copy the resulting hash string (it starts with 6ドル$) and paste it into the passwordHash field in /mnt/home/USER/flakes/flake.nix.
Security Reminder: The password hash is now only stored in your build directory (~/flakes), keeping your Git repository (~/flakes-git) clean and secure with dummy values.
2.6. Generate Hardware Configuration
Generate a hardware-specific configuration file: hardware-configuration.nix for your machine and place it inside your flake's sub directory.
sudo nixos-generate-config --root /mnt --dir /mnt/home/USER/flakes/sub
The command above also creates a default configuration.nix, which we don't need. Remove it.
sudo rm /mnt/home/USER/flakes/sub/configuration.nix
Note on configuration.nix Removal: Traditionally, NixOS systems are managed through configuration.nix as the primary configuration file. However, in a Flakes-based setup, keeping both flake.nix and configuration.nix is equivalent to having different versions of APIs coexisting in the same system—it creates nothing but confusion and potential conflicts. The two approaches represent fundamentally different configuration paradigms: the legacy imperative style versus the modern declarative Flakes approach. There is absolutely no benefit to retaining the auto-generated configuration.nix file, as all system configuration is now centrally managed through flake.nix. Removing it eliminates any ambiguity about which configuration system is authoritative and ensures a clean, single-source-of-truth architecture.
2.7. Install NixOS
/mnt/home/USER/flakes/
├── flake.nix
└── sub
 ├── boot.nix
 ├── gnome-desktop.nix
 ├── hardware-configuration.nix
 ├── home.nix
 ├── key-remap.nix
 ├── system-packages.nix
 ├── system-settings.nix
 └── user.nix
You are now ready to install. Change into your flake's root directory and run the installer.
cd /mnt/home/USER/flakes
sudo nixos-install --flake .
The installer will read the flake.nix in the current directory, build the system, and install it to /mnt. It will automatically detect the pre-existing /mnt/home/USER directory, set the correct ownership, and preserve all your configuration files within it.
Once finished, reboot the system.
sudo reboot
Part 3: Post-Installation and Workflow
3.1. First Boot and Ownership Fix
After rebooting and logging in as your new user, the first thing you should do is manually verify and fix file ownership. This is a failsafe step to ensure you have full control over your configuration files.
sudo chown -R $USER:users /home/$USER/flakes
sudo chown -R $USER:users /home/$USER/flakes-git
3.2. The Daily Workflow
Your system is now managed entirely by the files in ~/flakes.
Here is the standard workflow for making changes.
- Edit Your Configuration
Make any desired changes to your system configuration in the working directory.
cd ~/flakes
code . # Or your favorite editor
- Test and Apply Changes
Build and apply your new configuration. The nix flake update command ensures your package sources (inputs) are up-to-date.
sudo nix flake update && sudo nixos-rebuild switch --flake .
If the build succeeds, the changes are applied immediately. If it fails, your system remains untouched.
- Persist Changes to
flakes-git
Once you are happy with a successful change, sync it from your working directory (~/flakes) to your Git directory (~/flakes-git). The method depends on your repository privacy settings:
A) Private Repository (Recommended Simple Workflow)
If your GitHub repository is private, you can safely sync everything as-is, including the actual password hash:
# Simple sync - keeps actual password hash
rsync -av --delete ~/flakes/sub/ ~/flakes-git/sub/ && rsync -av ~/flakes/flake.nix ~/flakes-git/flake.nix
Benefits:
- Simple workflow: No extra steps needed
- Seamless inheritance: Next installation automatically inherits your password
- Repository safety: Private repos protect sensitive information
B) Public Repository or Extra Security (Advanced Workflow)
If your repository is public or you want extra security even with private repos, use the password hash protection workflow:
# First, backup your current password hash
CURRENT_HASH=$(grep 'passwordHash = ' ~/flakes/flake.nix | sed 's/.*passwordHash = "\([^"]*\)".*/1円/')
# Replace password hash with dummy in your build directory
sed -i 's/passwordHash = "\6ドル\$.*";/passwordHash = "DUMMY_HASH_REPLACE_DURING_INSTALL";/' ~/flakes/flake.nix
# Sync changes with the safe, targeted one-liner command
rsync -av --delete ~/flakes/sub/ ~/flakes-git/sub/ && rsync -av ~/flakes/flake.nix ~/flakes-git/flake.nix
# Restore the actual password hash in your build directory
sed -i "s/passwordHash = \"DUMMY_HASH_REPLACE_DURING_INSTALL\";/passwordHash = \"$CURRENT_HASH\";/" ~/flakes/flake.nix
Benefits:
- Repository safety: Git never contains actual password hashes
- Build directory integrity: Your
~/flakesremains functional - Public sharing: Safe for public repositories
Command Rationale and Validity
Both workflows use the same core synchronization approach:
rsync -av --delete ~/flakes/sub/ ~/flakes-git/sub/: Mirrors thesubdirectory with proper deletion handling&&: Ensures the second command only runs if the first succeedsrsync -av ~/flakes/flake.nix ~/flakes-git/flake.nix: Copies the main configuration file
The difference is whether the password hash is temporarily replaced (Option B) or kept as-is (Option A).
- Commit and Push to GitHub Repository
After synchronizing, commit the changes and push them to GitHub:
cd ~/flakes-git
git add -A -v
git commit -m "feat: updated system configuration" # Or any descriptive message
git push
Workflow Summary
Choose your approach based on your needs:
- Option A (Private Repository): Simple, straightforward workflow with password hash inheritance
- Option B (Public/Extra Security): More complex but provides additional security layers
The next time you install NixOS, the installation process will begin from this updated repository:
- Option A: Inherits your exact configuration including password
- Option B: Inherits all configuration except password hash (requires regeneration during installation)
Both approaches provide complete system reproducibility while accommodating different security requirements.
After all, the user information and all other settings you've configured are now permanently saved to your GitHub repository.
The next time you install NixOS, for example on different hardware, the installation process will now begin from this updated repository. This allows you to reproduce and inherit the exact, most recent state of your NixOS system.
Why Use ~/flakes? (A Comparison with the Default /etc/nixos)
Your system is now managed entirely by the files in ~/flakes.
This fact can be described as the single greatest feature of NixOS. It directly connects to the immense benefit of having a complete backup of your entire OS on a GitHub repository, simply by managing all system configuration within a single directory.
It's important to note that in a default NixOS setup, the configuration files (configuration.nix or flake.nix) reside in /etc/nixos/, not ~/flakes/ as we have done. However, this default location has two very significant problems, which we have intentionally avoided.
First, there is an issue with design philosophy. In any practical setup, flake.nix will include user-space settings via a tool called Home Manager, which configures files within a user's home directory (/home/USER/). Placing this user-specific configuration within a system-wide directory like /etc/nixos/ is inconsistent with standard Linux conventions and can be considered a broken design.
Second, and most importantly, is the practical issue of permissions. Any file under the /etc/nixos/ directory requires sudo privileges to edit. If the "only set of configuration files we ever need to touch" resides here, every single edit in our daily workflow would require sudo. While using sudo nano is fine for a single file, as we did during the initial installation, it becomes completely impractical when you need to frequently edit an entire directory of configuration files. The critical issue is that modern editors like VSCode are, for security reasons, restricted from opening system-level directories that require root access. This means /etc/nixos/ is effectively unusable for editing in VSCode. This is a massive drawback. Therefore, to enable a sane and productive workflow, the Flakes configuration must reside in the user's home space (/home/USER/).
Next Step: Making the System Your Own
Now that your system is running, the most crucial next step is to establish a "flawless development setup." As you have come to understand, managing NixOS is almost exclusively about editing configuration files. Therefore, your most powerful weapon will be a high-function IDE (Integrated Development Environment).
Start by installing an editor like VSCode and adding one of the excellent Nix language extensions available. The benefits of syntax highlighting, autocompletion, and error checking will dramatically improve your configuration workflow.
Once you are set up, open your configuration's entry point, ~/flakes/flake.nix, in your IDE.
/home/USER/flakes/
├── flake.nix
└── sub
 ├── boot.nix
 ├── gnome-desktop.nix
 ├── hardware-configuration.nix
 ├── home.nix
 ├── key-remap.nix
 ├── system-packages.nix
 ├── system-settings.nix
 └── user.nix
You will see that your entire system is composed of a collection of modules, just like this:
 modules = [
 # System state version
 {
 system.stateVersion = stateVersion; # Did you read the comment?
 }
 # Import the Home Manager NixOS module first
 home-manager.nixosModules.home-manager
 # Then import your home configuration module
 ./sub/home.nix
 # Import other necessary system-wide modules
 ./sub/hardware-configuration.nix
 ./sub/boot.nix
 ./sub/user.nix # System-wide user settings
 ./sub/gnome-desktop.nix
 ./sub/key-remap.nix
 ./sub/system-packages.nix
 ./sub/system-settings.nix
 ];
These modules are your system. Here is a guide to some of the key files:
-
hardware-configuration.nixThis file was generated by the
nixos-generate-configcommand during the installation process. You should not modify this file. -
boot.nixThis Flake controls the system's boot behavior. The bootloader is currently systemd-boot, but you should change it to GRUB if necessary. It uses the linux_zen kernel, but you should change it to match your style. NixOS allows you to easily select and roll back to previous versions at boot time, and this file also lets you configure the rules for clearing that history to save disk space.
-
gnome-desktop.nixCurrently, this system uses GNOME as its desktop environment, and its settings are consolidated in this file. If you prefer KDE or another environment, you should challenge yourself to switch it out. If you show the contents of gnome-desktop.nix to an AI and ask, "I want to change this to KDE," it will surely provide powerful assistance.
-
key-remap.nixThe author is a heavy user of the Apple Magic Keyboard, so this file contains special key remapping settings. This is not for everyone. You should feel free to edit it to match your style, or delete the file entirely. An AI can also assist you with this task.
-
system-packages.nixThis is a straightforward list of application packages to be installed system-wide. You can find over 120,000 packages on the NixOS packages search website.
-
system-settings.nixHere, low-level system settings are defined, such as TimeZone configuration, keyboard layout, the audio service to use, and Firewall settings.
-
user.nixConfigures system users, including the primary user account, password settings, and sudo privileges.
-
home.nixYour individual user environment settings are centralized here. The author is a native Japanese speaker, so the defaults are optimized for a Japanese environment.
-
Shell: The default shell is ZSH, pre-configured with useful features and the Powerlevel10k theme.
-
Fonts & Language: Fonts are set up to display Japanese characters correctly.
-
Input Method: The system is configured for Japanese input using Fcit5 and Mozc.
-
Terminal: The terminal application is Ghostty, which includes its own custom keybindings.
-
You should actively edit all of these files through your IDE. That is the one true way to make this system your own.