Friday, June 20, 2025
A Guide to Using ST Edge AI Developer Cloud
In a previous post, A Guide to STMicroelectronics' Edge AI Suite Tools , I provided an overview of the tools in STMicroelectronics' Edge AI Suite. In this post, we'll focus on one such tool— ST Edge AI Developer Cloud— and walk through how to use it to test machine learning models.
ST Edge AI Developer Cloud is a web-based tool that allows you to test machine learning models by remotely accessing ST boards. It enables simulation of deployment and performance testing without the need to purchase any physical boards.
This guide outlines each step required to use the Developer Cloud, with screenshots provided to show the exact process. A similar walkthrough is also available in a video on the STMicroelectronics YouTube Channel.
Walkthrough
1. Accessing Edge AI Developer Cloud
Visit the ST Edge AI Developer Cloud and click "Start Now" on the landing page.
ST Edge AI Developer Cloud Start Page2. Sign in or Create an Account
To use the tool, log into your myST account or create one if you haven't already.
Create myST Account3. Import a Model
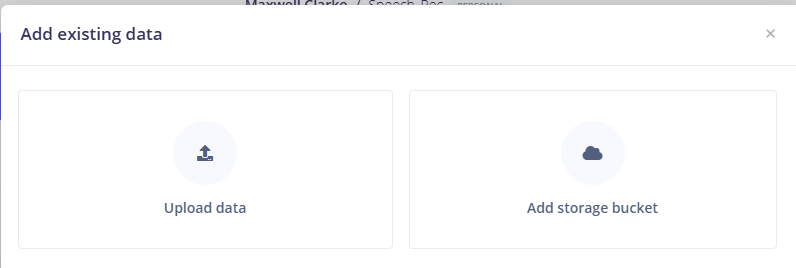
Import a model from your device or from the ST Model Zoo. For this example, I will use the first "Hand Posture" model that appears in the Model Zoo. Once selected, click "Start" next to the imported model.
Select Hand Posture Model4. Choose Platform & Version
Select a version and platform to use. For this demonstration, I will use the default version, ST Edge AI Core 1.0.0, and select STM32 MPUs as the target platform.
Platform and Version Selection5. Quantize the Model
Click "Launch Quantization". You may also upload a .npz file for accuracy evaluation.
After quantization, click "Go Next" to move on to the Optimization stage.
6. Optimize the Model
In the Optimization section, select a .tflite file from the model selector at the top,
then click "Optimize".
Once the model has been optimized, click "Continue", which will appear next to the "Optimize" button.
7. Benchmark Across Boards
Click "Start Benchmark" for all available boards. This will remotely run inference on a physical board and display the inference time once complete. Afterwards, click "Go Next" above the boards.
Benchmark Across Boards8. View Results
Under the "Results" section, you can view metrics such as weight size, performance, and resource utilization.
The "Show details per layer" option shows the resource utilization on the selected board, and the "Show performance summary" option compares inference times across all tested boards. After reviewing the results, click "Go Next".
View Inference Results9. Generate Code
Based on the benchmark results, generate code tailored to the optimal board. In this example, we will select the STM32MP135F-DK board, as it showed the fastest inference time. To view the timings, refer to the "Show Performance Summary" graph from the "Results" section.
Code Generation SummaryConclusion
The ST Edge AI Developer Cloud is a powerful testing environment for optimizing AI models on ST hardware. By allowing developers to evaluate boards remotely, it streamlines the deployment process and speeds up decision-making when selecting the best platform for your machine learning applications.
Tuesday, May 13, 2025
Fix for KiCad Causing Windows Shutdown
Recently while working with KiCad 9.0.2, my Windows 11 machine kept shutting down unexpectedly. To fix this issue I had to uninstall all versions of KiCad on my computer, then reinstall the latest version. In this instance, I had 7.0, 8.0 and 9.0 installed.
Once all versions have been removed, double check your start menu for an app called "KiCad Command Prompt". If it appears, you may need to uninstall it also. Additionally, you may need to restart your computer. Afterwards, proceed with reinstalling 9.0.2.
Now that 9.0.2 runs smoothly, I will check back upon future releases to see if similar issues arise.
Friday, March 14, 2025
How to Build the TensorFlow Lite C API from Source Inside WSL
TensorFlow Lite is a lightweight, efficient runtime for deploying machine learning models on edge devices. It's ideal for environments that are low-power and performance-critical such as embedded systems mobile devices, and microcontrollers.
Building the TensorFlow Lite C API from source inside Windows Subsystem for Linux (WSL) allows you to integrate AI inference into native C applications. This is useful when working on constrained devices, building low-level systems, or working with existing C/C++ codebases.
Step 1: Set Up WSL and Create a .wslconfig File (Optional)
+To prevent Bazel crashes from memory exhaustion, increase the memory limit for WSL. First, Open the Terminal(Windows Powershell):
# On Windows (not WSL):
Create C:\Users\<yourname>\.wslconfig with the following content:
[wsl2]
memory=6GB
processors=4
To do this with Notepad:
- Open the Start menu and type Notepad
- Paste the above configuration text into the new file
- Click File > Save As...
- Set File name:
.wslconfig - Set Save as type: to
All Files - Save it to
C:\Users\<yourname>\
Then from PowerShell:
wsl --shutdownStep 2: Install Prerequisites
sudo apt update
sudo apt install -y build-essential clang git wget python3-pip
Step 3: Install Numpy
pip install numpyStep 4: Install Bazelisk
wget https://github.com/bazelbuild/bazelisk/releases/download/v1.17.0/bazelisk-linux-amd64 -O bazelisk
chmod +x bazelisk
sudo mv bazelisk /usr/local/bin/bazelisk
Step 5: Set the Required Bazel Version
export USE_BAZEL_VERSION=5.3.0
echo 'export USE_BAZEL_VERSION=5.3.0'>> ~/.bashrc
source ~/.bashrc
Step 6: Clone TensorFlow and Check Out the Version
git clone https://github.com/tensorflow/tensorflow.git
cd tensorflow
git checkout v2.12.0
Step 7: Build TensorFlow Lite C API
Optional but recommended: limit RAM usage to avoid crashes.
export BAZEL_BUILD_OPTS="--local_ram_resources=2048"
cd tensorflow/tensorflow/lite/c
bazelisk build -c opt $BAZEL_BUILD_OPTS --define=flatbuffer_op_resolver=false //tensorflow/lite/c:libtensorflowlite_c.so
Step 8: Install the Library and Headers
cd ~/tensorflow
sudo cp bazel-bin/tensorflow/lite/c/libtensorflowlite_c.so /usr/local/lib/
sudo ldconfig
# Copy required top-level headers
sudo mkdir -p /usr/local/include/tflite
sudo cp tensorflow/lite/c/c_api.h /usr/local/include/tflite/
# Copy all internal TensorFlow Lite C API dependencies
sudo mkdir -p /usr/local/include/tensorflow/lite/core/c
sudo cp tensorflow/lite/core/c/c_api.h /usr/local/include/tensorflow/lite/core/c/
sudo cp tensorflow/lite/core/c/c_api_types.h /usr/local/include/tensorflow/lite/core/c/
# Copy additional headers required by the C API
sudo mkdir -p /usr/local/include/tensorflow/lite
sudo cp tensorflow/lite/builtin_ops.h /usr/local/include/tensorflow/lite/
Step 9: Verify With a Simple C Program
#include "tflite/c_api.h"
#include <stdio.h>
int main() {
 TfLiteModel* model = TfLiteModelCreateFromFile("model.tflite");
 if (!model) {
 printf("Failed to load TensorFlow Lite model\n");
 return 1;
 }
 printf("TensorFlow Lite model loaded successfully!\n");
 TfLiteModelDelete(model);
 return 0;
}
Compile it with:
gcc -o tflite_test tflite_test.c -I/usr/local/include -L/usr/local/lib -ltensorflowlite_c
./tflite_test
Conclusion
Now that you’ve built the TensorFlow Lite C API from source inside WSL, you're ready to run AI inference directly in your C applications. This setup is ideal for embedded AI applications such as digital signal processing. By building from source, you gain control when integrating with systems where Python or heavy dependencies are incompatible.
Wednesday, January 15, 2025
Previewing NVIDIA's Cosmos, a Generative AI Worldbuilding Tool
NVIDIA Cosmos is a new platform from NVIDIA that uses generative AI for digital worldbuilding. In this post, I will demonstrate some possible outputs from Cosmos using NVIDIA's simulation tools. Afterward, I will discuss some of the functions and libraries Cosmos uses.
To create your own digital worlds with Cosmos, follow this link to the Simulation Tools in NVIDIA Explore NVIDIA Explore - Simulation Tools. To start, we will select the cosmos-1.0-diffusion-7b.
Once we've selected cosmos-1.0-diffusion-7b, we are presented with an option to input text, an image, or a video. The default example is a robot rolling through a chemical plant, with a video as the output.
For this demonstration, I'm going to begin by inputting the following text into the input box: "A crane at a dock lifting a large cargo crate from a ship onto the dock. photorealistic" After about 60 seconds, Cosmos produces a short 5-second video as output. Here is a frame from the one it generated from my first prompt:
In this case, we used the Cosmos-1.0-diffusion-7b-Text2World model, which takes an input of up 300 words and produces an output video of 121 frames.As described in the linked documentation, it uses self-attention, cross-attention, and feedforward layers. Additionally, it uses adaptive layer normalization for denoising between each layer. Each layer is necessary and serves a unique purpose.
Starting with the self-attention layer, it is used to determine what words in the input text will be most relevant to the output image. For example, the word "crane" in our prompt is weighted higher than the word "at". While both are relevant to the output, the object of the crane is in the center of the video. Next, the cross-attention layer relates the information contained in each word and assigns it to a relevant image as a result. In our case, this is shown by the word crate and the image of a brown crate. To clarify, the word "crate" is referred to as the source, and the image is referred to as the target.
The third layer, the feedforward layer, redefines each word after the the cross-attention layer finds it relevance. For example, the crate in our example is placed on the dock in our image, because the feedforward layer related it to the phrase "onto the dock". Lastly, the adaptive layer normalization stabilizes the output, which in this case could refer to making the crane move slowly and not too jittery.
In addition to the cosmos-1.0-7b-diffusion-7b which uses the text2world model, there is also the cosmos-1.0-autoregressive-5b model.
This model takes a picture as input and produces a 5-second video as an output. The first frame of the output video is the exact picture, and the model predicts what happens in the next 5 seconds of the scene to create the video. For this model, there are a series of 9 preselected images to choose from.
Similar to the text2world model, the autoregressive video2world model employs self-attention, cross-attention, and feedforward layers. It should be noted that while this model is referred to as video2world, it can accept text, images, or videos as input, and outputs a video from whichever input was given.
Overall, NVIDIA Cosmos is a powerful worldbuilding tool for a variety of applications including simulation software as well as game development. To learn more about the development tools NVIDIA has to offer, check out the following post: An Overview of NVIDIA's AI Tools for Developers
Wednesday, January 8, 2025
NVIDIA's Jetson Orin Nano Super Developer Kit
This new Super Developer Kit is an upgraded version of the previous Jetson Orin Nano Developer Kit. NVIDIA has provided the JetPack 6.1 SDK which can be used on existing Jetson Orin Nano Developer Kits to access features from the Super developer Kit. To unlock the super performance, users can select the latest release of JetPack, Jetpack 6.1 (rev. 1), when installing the latest SD Card image for the Kit. Detailed installation instructions can be found on the following page: JetPack SDK .
The following table from NVIDIA highlights the main improvements of the Super Developer Kit, including the improved operating speed of up to 67 TOPS and memory bandwidth of 102 GB/s. In this video, NVIDIA CEO Jensen Huang presents the Jetson Orin Nano Super Developer Kit.
Monday, December 2, 2024
An Overview of NVIDIA's AI Tools For Developers
Here is a quick overview of the tools NVIDIA offers for Developers! All of these tools are available through the NVIDIA Developer platform, and joining is free. NVIDIA also offers the Jetson Orin Nano Super Developer kit which I review in the post: NVIDIA's Jetson Orin Nano Super Developer Kit
NIM APIs - designed for developers who need to perform AI inference in various scenarios. Notable examples include the Deepfake Image Detection Model by Hive, and the llama-3.2-90b-vision-instruct model by Meta. The following video is an excellent tutorial for getting started with an NVIDIA NIM.
LLMs - NVIDIA provides Large Language Models(LLMs) for tasks such as data generation and classification. These models, including the latest Llama 3.1, are valuable for AI applications like deep reasoning. Customize Generative AI Models for Enterprise Applications with Llama 3.1
Generative AI Solutions - NVIDIA's Generative AI Solutions offer a comprehensive set of tools for developers. A great starting point is the Full-Stack Generative AI Platform for Developers. This platform provides an overview of NVIDIA's software. hardware, and services for building with Generative AI. Its "full-stack" approach enables developers to complete entire builds using NVIDIA products.
NVIDIA Documentation Hub - a centralized resource for accessing technical documentation for all NVIDIA products and services.
AI Inference Tools and Technologies - NVIDIA offers tools specifically designed to perform inference, which involves using AI to generate or process data. Three notable tools included in this page are sample applications for Building a Digital Human (Avatar), Designing Molecules, and Data Extraction.
Riva Speech AI SDK - a collection of software development kits (SDKs) useful for speech-related tasks. It offers starter guides for key use cases, including Text-To-Speech, Automatic Speech Recognition, and Neural Machine Translation. A tutorial for getting started with RIVA can be found in the video below.
NVIDIA Developer Forums - an excellent resource for developers to ask questions and find answers to technical issues related to NVIDIA's AI tools.
Friday, November 29, 2024
Black Friday 2024 Deals on Maker Electronics!
Here are some of the deals major online electronic retailers are offering this Black Friday!
Adafruit Industries -15% Off with code acidburn15 Hack the Holidays – Use Code acidburn15 for 15% Off « Adafruit Industries – Makers, hackers, artists, designers and engineers!
Pololu is offering discounts (up to 50% off!) on many electronic components including Robot Chassis, motors, sensors, and much, much more! Check out the link for all details and a categorized list of all products on sale: Pololu Black Friday Sale 2024.
STMicroelectronics is offering free worldwide shipping through November 30th! Additionally, select Motor Control Evaluation Boards have discounts with code DV-ASP-BOGO-11 at checkout. eStore - STMicroelectronics - Buy Direct from ST
Raspberry Pi While not a Black Friday deal, the Raspberry Pi Compute Module is now available for 45ドル from the Raspberry Pi Store. It is a modular version of the Raspberry Pi 5.
2024 Black Friday Sale - BC Robotics Receive free gifts with purchases and save on select items. Additionally, there are door crasher deals.
Parts Express save 12% sitewide with code BLACKFRI24
RobotShop has up to 70% off on select products
JLCPCB:Black Friday 2024 Deals and Coupons- Coupons on PCB orders
Find any other great deals on electronics? Let me know in the comments below!
Saturday, November 2, 2024
A Guide to STMicroelectronics' Edge AI Suite Tools
STMicroelectronics has plenty of Edge AI Tools that are useful in a variety of applications. They collectively form the ST Edge AI Suite - STMicroelectronics. All of these tools can be used free of charge with a myST user account. To create an account, click on the avatar in the top right corner of the STMicroelectronics Website. You are now ready to access the ST Edge AI Suite!
1. NanoEdge AI Studio
The first tool is NanoEdge AI Studio, it is a good place to get started with Machine Learning.
It is also compatible with Arduino Devices.
For getting started, the following video is a good example - Anomaly Detection Demo Using Edge AI. It uses the Accelerometer on the STEVAL-STWINKT1B board. In a future blog post I will try this demo using some other ST Micro boards that have an accelerometer. Additionally, the Nano Edge AI libraries can be used with any type of sensor.